
Expert Tips for Resizing Images for Blog Need to Know Images


Are you a blogger & frequently publish blogs on a website? Are you wondering how to optimize images for blog posts and looking for the best ways to do it properly? This blog has got you covered.
Well-optimized & high-quality images can help deliver more engaging, informed & well-explained blogs. Images & good visuals not only help readers understand what you want to convey, spice up boring information & make your digital media posts more captive.
Thereby more & more bloggers or news article writers try to include infographics in their blogs to cover comprehensive details appealingly. Just like high-quality content, Google can index optimized images also and make them available in organic search.
Here, Image resizing & optimization for blogs help you effectively achieve organic traffic, increase users’ retention rates, and a better position in search engine result pages (SERPs). This blog will help you understand everything about image optimization for blogs. Let’s first discuss the basics.
What Do You Mean By Image Optimization?
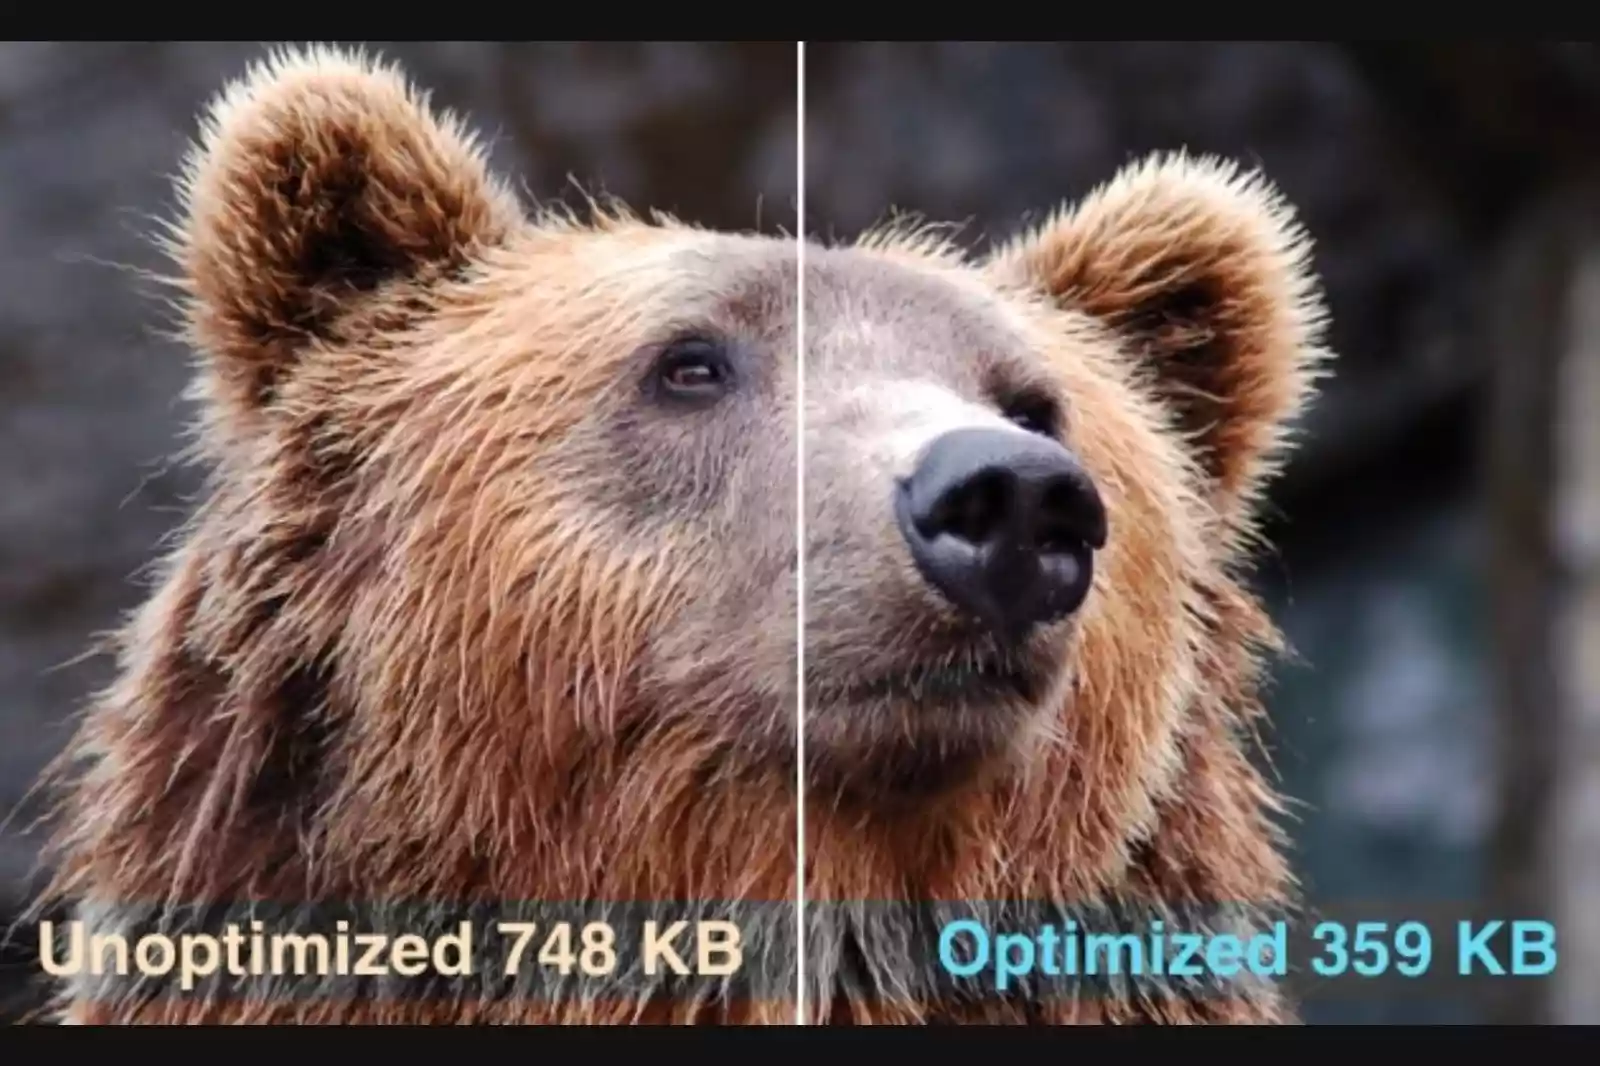
Image Optimization is digitally manipulating a large image file using an online software or compression tool to reduce its size without affecting the quality. The concept is all about creating & delivering high-quality images in the right size, format, and dimensions by keeping the smallest file size possible.
Optimized images for blog posts reduce overall page load time by 80%, which helps to rank higher on Google.
Why It’s Important to Optimize Images for Blog?
There are several reasons to optimize images for blogs. For example:
1. Google will likely show your images in search queries, helping you drive relevant organic traffic.
2. It ensures faster page loading speed, thus improving website speed.
3. Drive traffic from Pinterest, Instagram, or other visual content sites.
4. Achieve more backlinks
5. Adds relevance to your content, etc.
How to Optimize Images for Blogs? Find Expert Tips

Here is the step-by-step guide to show you how to optimize or resize images for blogs. Take a look:
1. Find the Right Image for your Blog
We all use images in our articles or blog posts as Google prefers textual content with images higher than without images. Also, optimized & clear product images help users make informed decisions during online shopping.
Thereby, it is essential to be careful while choosing images. You can’t use copyrighted images from Google as it might get you in legal trouble. Instead, there are a few websites that you can use to get stock images for free for your article, such as Pixabay, Unsplash, etc. However, creating custom images for your blogs would be better.
2. Choose the Right Image File Type
Using an incorrect image file type in your blogs may cause your images to be displayed as blurry, distorted, and unpleasant. But there are many image file types, including JPG, PNG, WebP, and GIF - which is the best to use?
JPEG & PNG are the two most common image file formats used for blogs on the web. It is best to use JPEG files for large photos as they can be displayed by any type of device & preserve color quality.
Simultaneously, PNG files are suitable for infographics, banners, and screenshots. They support transparent backgrounds and use lossless compression. GIFs are ideal for animation effects.
3. Image Size/Dimensions
The next thing you need to take care of while optimizing images is the size of the image and its dimensions. Sometimes web pages take forever; even though they don’t have too many images, they still load slowly. Why? It is because of incorrect image dimensions, i.e., large file sizes.
Many bloggers don’t resize or compress images before posting them online. It makes your page load slow, and heavy image file sizes are to blame. Large photos also affect image SEO rankings more than small images. Reducing image dimensions or resizing pictures is another way to optimize images.
4. Use Free Online Image Resizing/Compression Tools
Yes, now you can optimize images online for free. Try online image compression tools like Shrink.media to resize images online, which works great. Though various free & paid image resizing tools are available, it is the best-recommended tool. Let’s find out about it in detail:
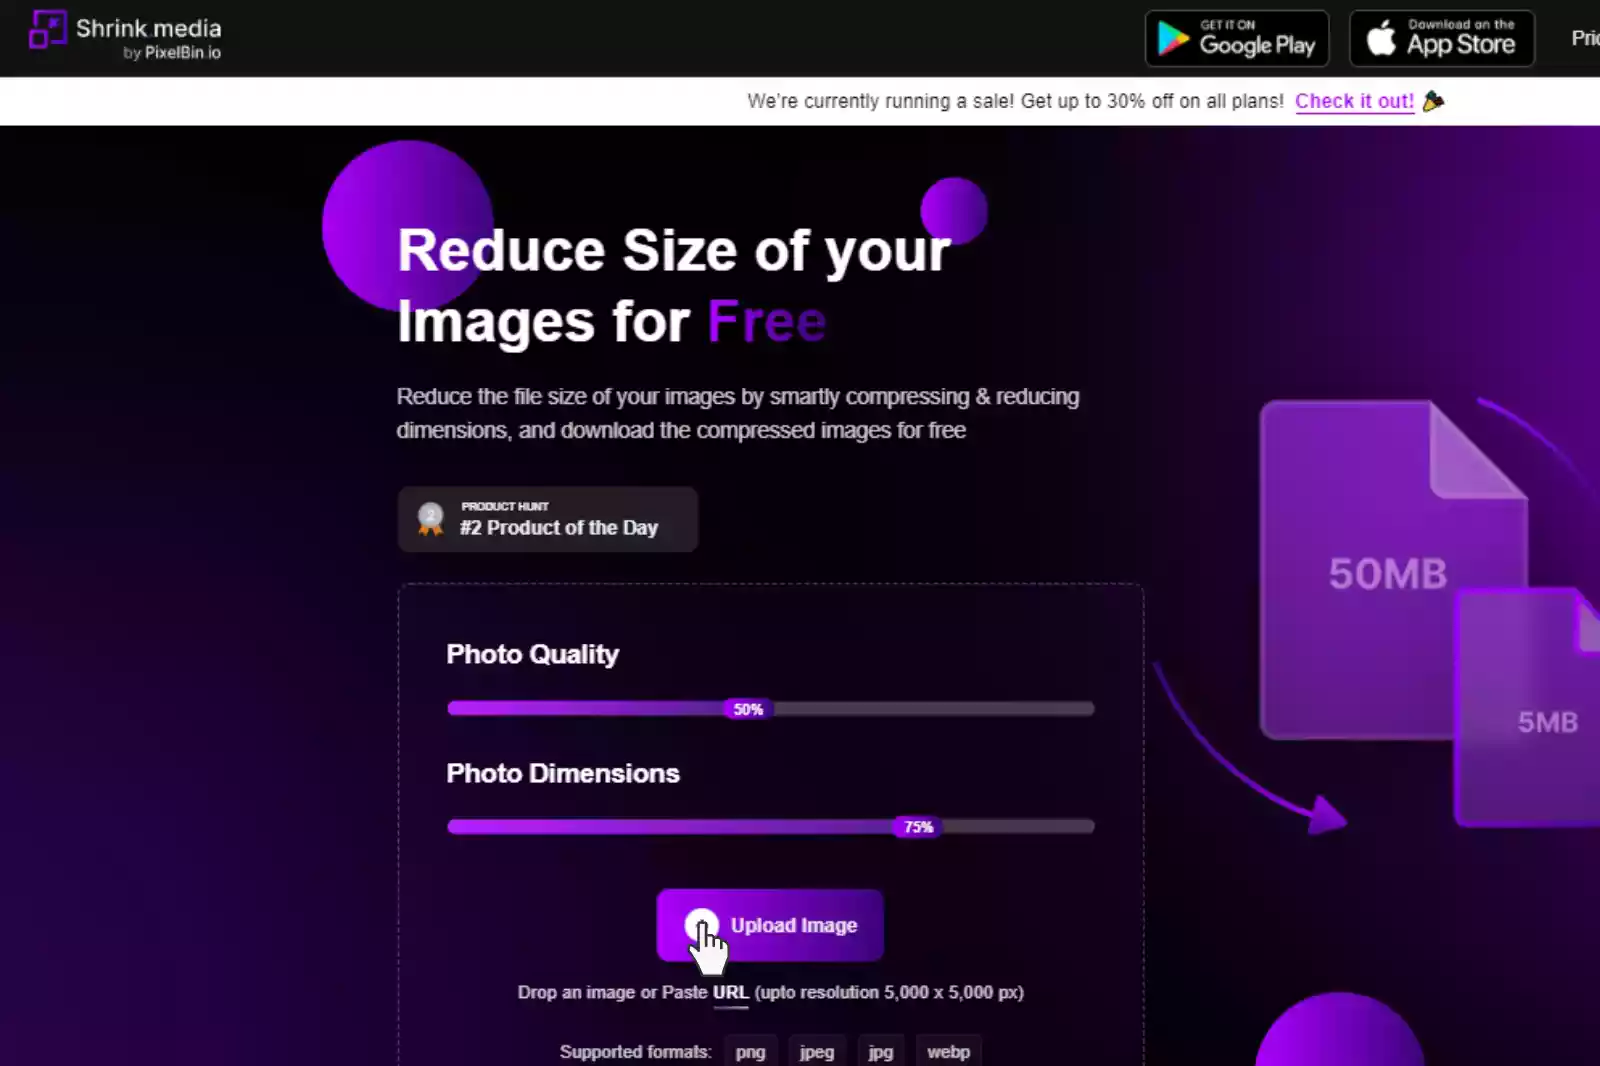
Shrink.media - A Free Online Image Compression Tool
Now you don’t have to struggle through technical software like Photoshop or know any coding skills. Shrink.media is a free, easy, lightweight & automated online image compression tool to resize larger image file sizes within seconds.
Just upload the image you wish to reduce the size and get impressive results with 100% quality retention. There are no extended hours of technical manual editing. Instead, AI algorithms automatically resize images per your preferred data manipulation choices.
The app of Shrink.media is available on the Play Store & App Store, where you can download it for free for your Android/iOS devices. Here are the steps to use Shrink.media to resize images:
Step 1 - First, visit the app's official site by typing Shrink.media in your search bar. You can also download it from the Play Store or App Store to your preferred mobile device.
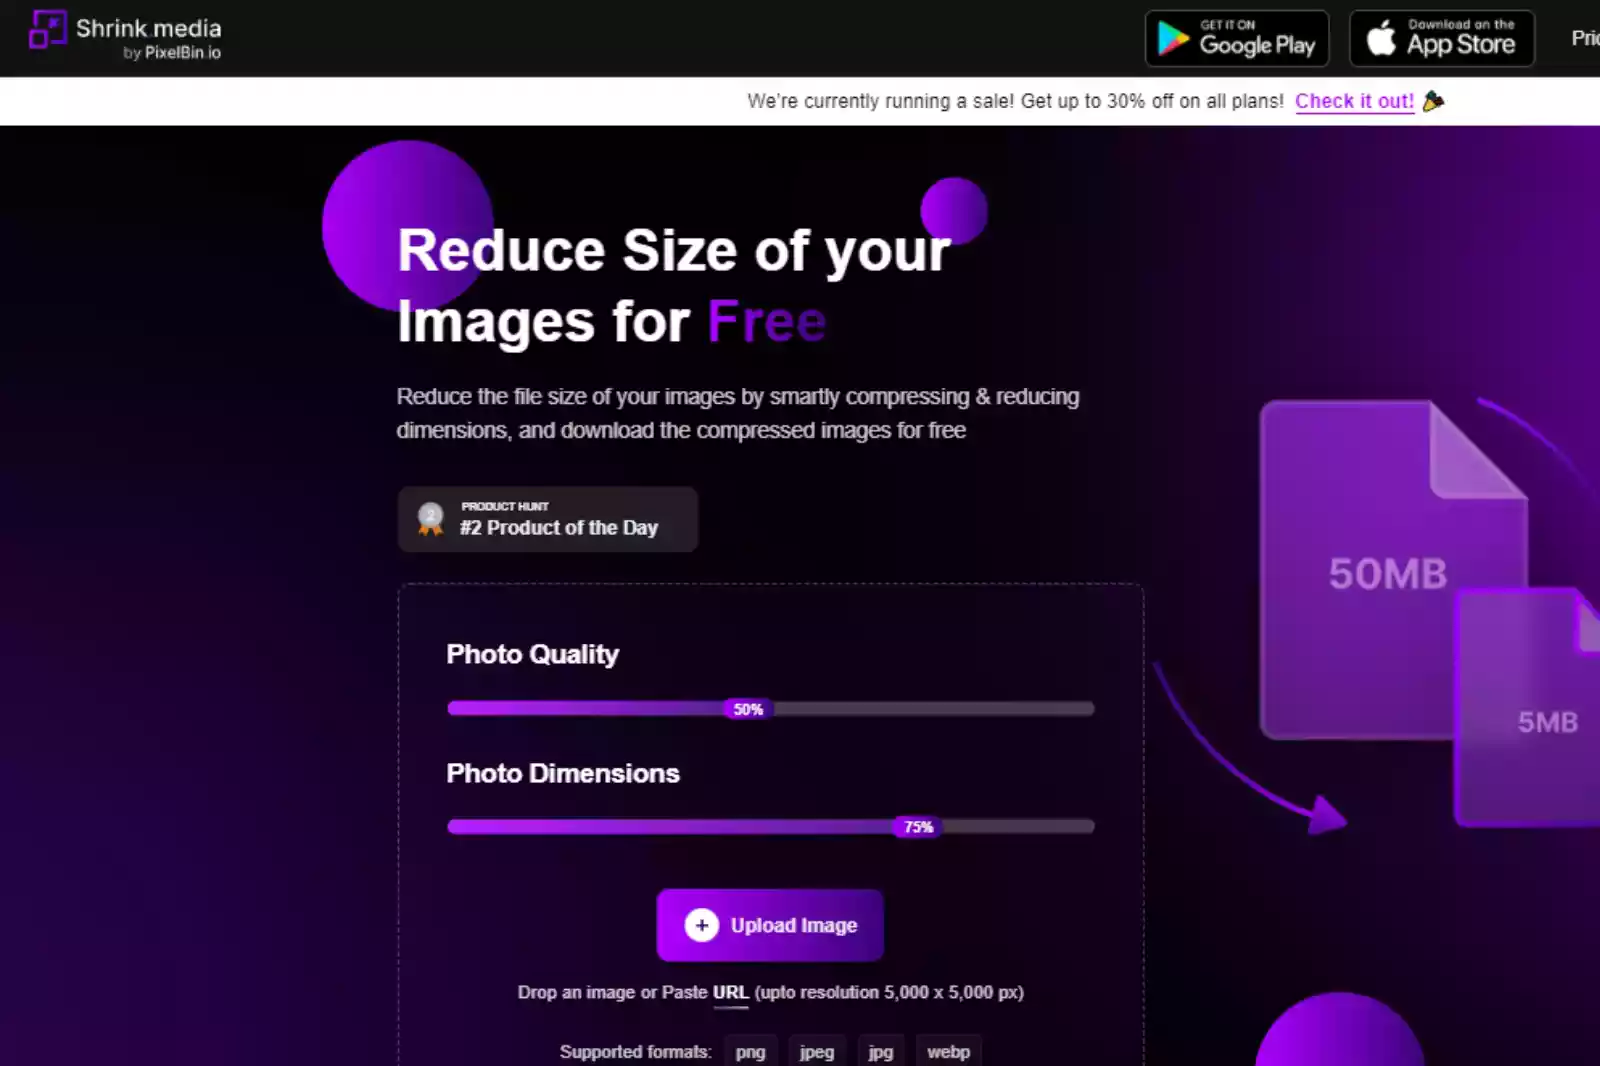
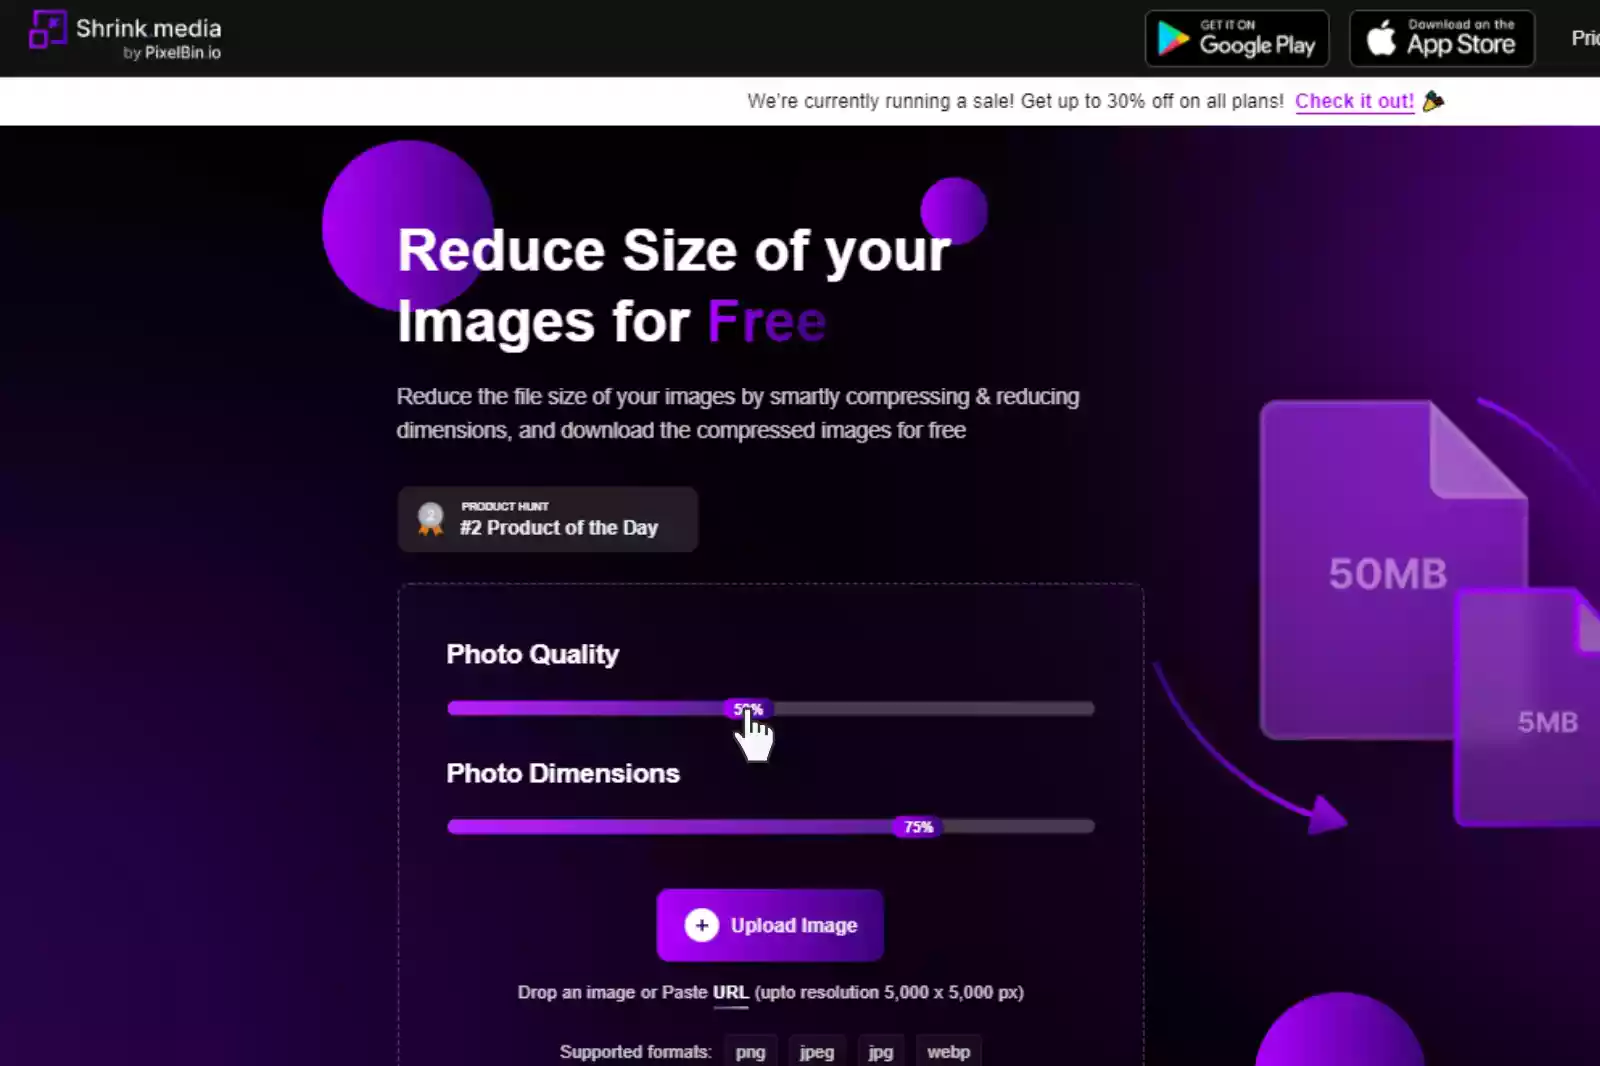
Step 2 - Adjust the percentage of Photo Quality & Photo Dimension by sliding the scale. It scales from 1 to 100 (with 100 being original, maximum quality). Figure out your image goals accordingly.
Step 3 - Upload the image by clicking the “+ Upload image” button. However, if you have the image address, you can upload the image by clicking on the “URL” button or simply “Drag & Drop” it.
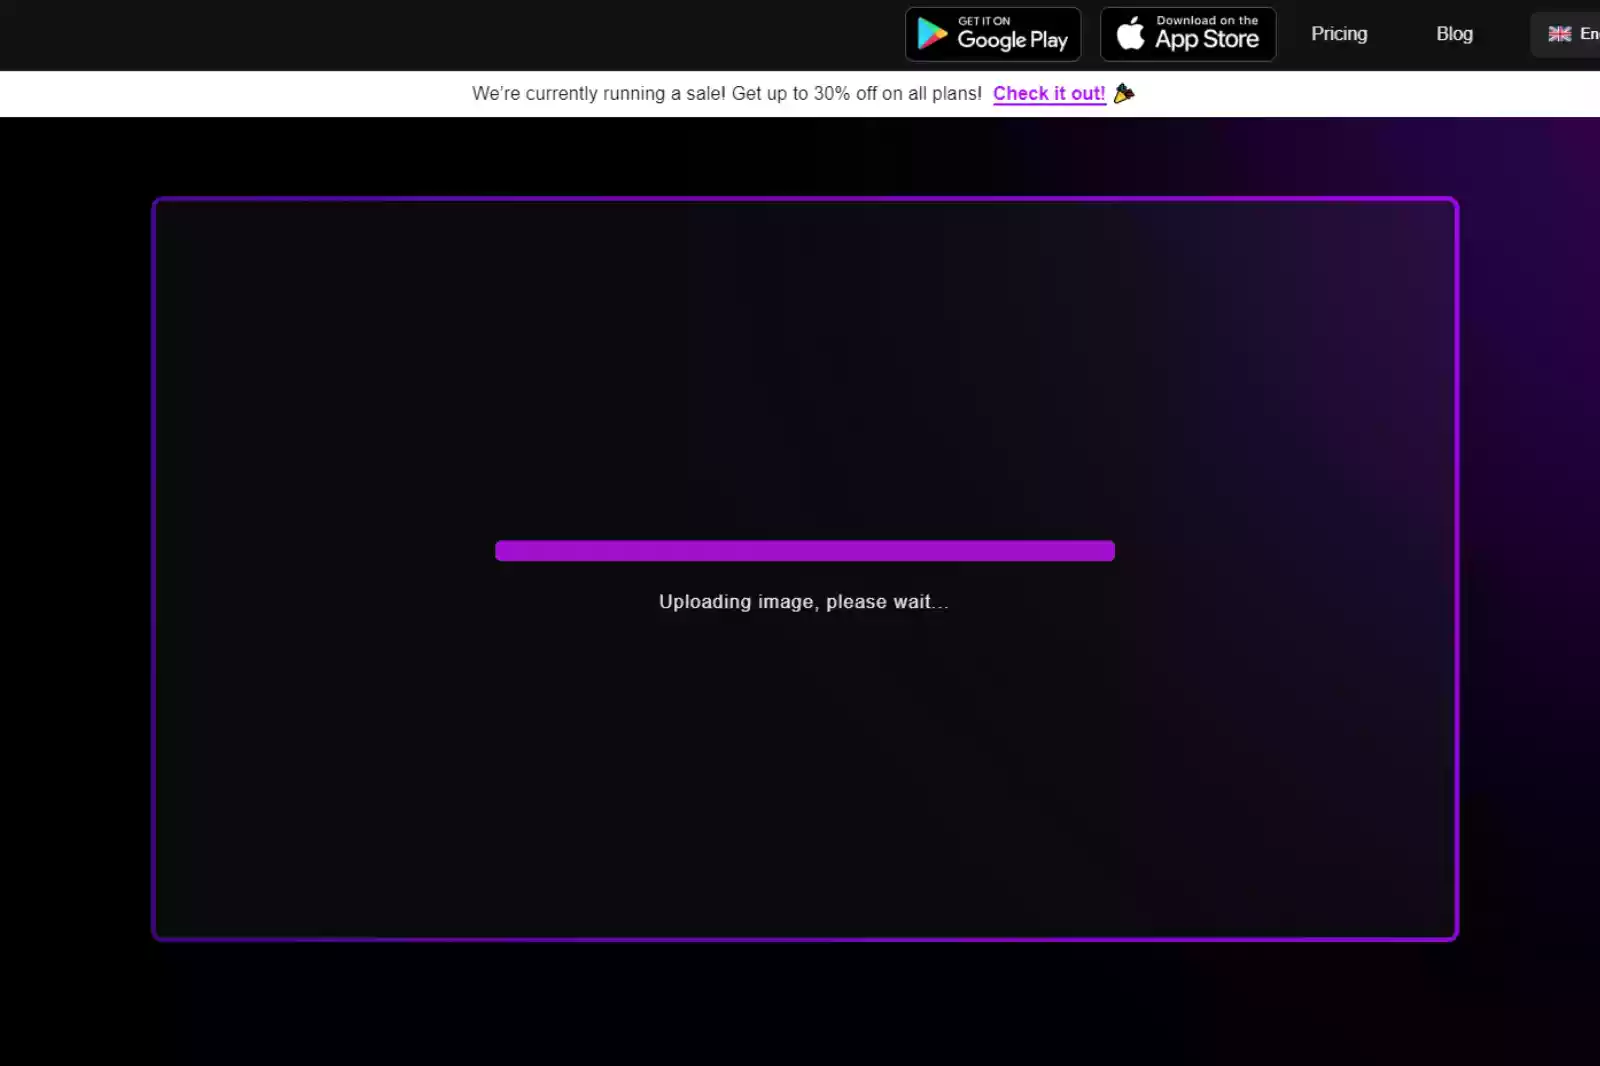
Step 4 - Submit the image. The AI algorithms will start processing the image. A message will be read, “Uploading image, please wait.” The process will take only two to three seconds.
Step 5 - When the processing ends, you can see the resized version of the image along with the necessary information.

Step 6 - If you are satisfied, download the image. However, you can re-adjust the settings and press the Compress button. Finally, download the image.

Features of Shrink.media:
1. Free to Download & easy to use
2. Faster & accurate results
3. 100% quality retention
4. Based on AI to automate the process
5. No manual editing
6. No technical knowledge or coding skills are required.
7. It supports multiple images at a time in the paid version.
8. It supports various image formats, including PNG, JPEG, JPG, and WebP formats up to the resolutions of 5000 x 5000 px and 25 MB.
9. Available for Android/iOS devices.
10. It gives 50 credits per month in its free version.
So, stop wasting your time, money & efforts on Photoshop or professional designers. Instead, just download Shrink.media and get quality results anytime from anywhere.
5. Name the Image File Appropriately
The file name is another crucial element that plays a vital role in blog image optimization. Even though it takes less than a minute to name an image file, many bloggers often ignore it.
All you need to do is stick with your content's theme, pick a suitable keyword related to the content, and name your file size. This small step can optimize your image for SEO.
6. Use WordPress Plugins
Do you know how to optimize WordPress images? Since many blogs run on popular WordPress platforms, you might wonder about the steps to optimize images in WordPress. You can use Wordpress plugins, which can automatically compress the image as uploaded on the Wordpress dashboard.
There are several image optimization WordPress plugins available such as Shortpixel, etc. They are lightweight. Every time you upload an image, it automatically compresses it.
7. Ensure Images are Mobile-friendly
If you’ve chosen the correct file format and compressed the image, you need to ensure that your pictures are mobile-friendly for your blogs. If you’re running a website or involved in the digital world somehow, you can’t ignore that more than half of all internet traffic comes from mobile devices.
So, you must ensure your images are compatible with mobile devices. You can access your website from several mobile devices to ensure images look best on various screen sizes, such as Tablets, iPhones, Android devices, etc.
8. Add Necessary Links
Sometimes, many blog readers directly click on the image to learn more about particular content. So, if you want to optimize your images for blog posts, a great idea is to ensure that your images have relevant links. For example, if you want to include a photo to your social media profile like Instagram, remember to add the link to your Instagram profile so it will be redirected to it.
Wrapping Up
Now you know about several ways & ideas to optimize images for blogs & get better rankings on search engine results. Don’t forget that image optimization is vital to reach a broader customer base and improve your blog’s position online. Whenever a user visits a web page, images are the first thing they notice, and they like to navigate the website for more.
FAQ's
What is the best size for a blog image?
The best size for a blog image is typically around 1200 pixels in width, which ensures compatibility across different devices and resolutions. It's crucial to balance image dimensions with the optimized file size to maintain fast loading times and a positive user experience.
What is the best size of image for a website in KB?
The best size of an image for a website is typically below 100 KB. By optimizing the image dimensions, resolution, and compression settings, you can achieve a balance between image quality and file size, resulting in faster loading times and better website performance.
How do I reduce the KB size of a picture without changing pixels?
To reduce the KB size of a picture without changing its pixels, you can utilize an online tool like Shrink.media. Upload the picture to Shrink.media, adjust the compression level, and download the optimized version with a reduced file size while striving to maintain the original pixel dimensions and acceptable visual quality.
What size should blog images be for SEO?
For SEO, blog images should generally be optimized to load quickly without sacrificing visual quality. Aim for a file size below 100 KB while maintaining a recommended width of around 1200 pixels, ensuring images are responsive, visually appealing, and contribute positively to overall website performance and user experience.
What is the best image type for SEO?
The best image type for SEO is generally considered to be WebP. WebP offers advanced compression technology, resulting in smaller file sizes than formats like JPEG or PNG while maintaining good image quality. By using WebP, you can enhance website performance, reduce loading times, and improve SEO rankings.
Does image size affect SEO?
Yes, image size does affect SEO. Large image sizes can slow down page loading times, negatively impacting user experience and SEO rankings. Optimizing image sizes by reducing file sizes through compression techniques can improve website performance, enhance user engagement, and positively impact SEO.
What is the best size for a blog image?
The best size for a blog image is typically around 1200 pixels in width, which ensures compatibility across different devices and resolutions. It's crucial to balance image dimensions with the optimized file size to maintain fast loading times and a positive user experience.


