
The Importance of Resizing Images by Pixel and How to Do It?


Resizing an image involves changing the number of pixels representing it, which can impact its quality. Whether you're increasing or decreasing its size, the process has implications. Enlarging an image (upsampling) often leads to blurriness as software estimates the color of added pixels. Conversely, reducing an image (downsampling) may result in a loss of detail, particularly in intricate areas.
Improper aspect ratio adjustments during resizing can distort the image, further impacting its quality. Changing resolution can affect pixelation, especially on larger screens or prints. It is essential to resize images carefully, considering the balance between file size or dimensions and image quality.
Furthermore, different image types handle resizing differently. Vector images can be resized without quality loss, unlike raster images. Recognizing these nuances is vital when approaching image resizing, as they have varying effects on the final image quality.
What is Image Resizing?
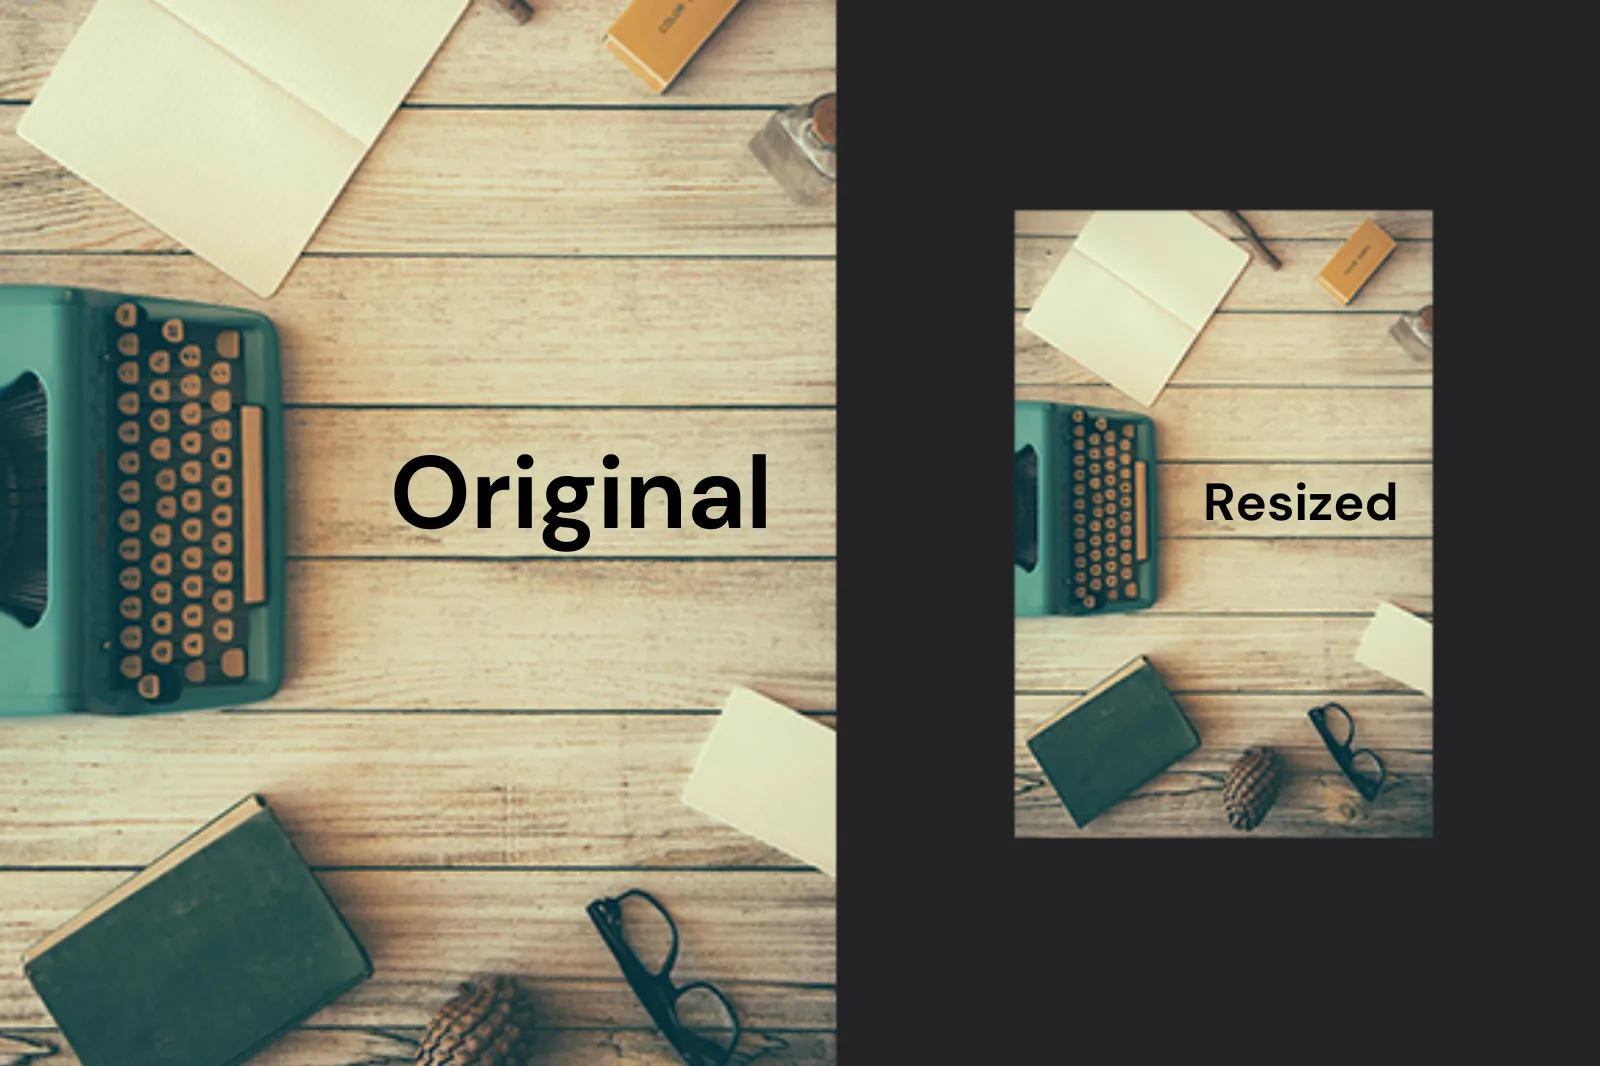
Image resizing refers to the process of adjusting the dimensions or scale of an image. It involves changing the number of pixels used to represent the image, either increasing or decreasing its size. Resizing images can serve various purposes, such as fitting them into specific layouts, optimizing file sizes for web usage, or preparing images for printing.
When an image is resized, the total number of pixels is altered, which can impact the visual quality. Enlarging an image (upsampling) may result in a loss of sharpness or clarity as the software attempts to estimate the missing pixel information. Conversely, reducing an image (downsampling) can lead to losing fine details, especially in intricate areas.
Considering the aspect ratio during resizing is important to avoid distortions and maintain the image's original proportions. Additionally, changing the resolution during resizing can cause pixelation, making the image appear blocky or pixelated, especially when viewed on larger screens or printed in a larger format.
Properly resizing images involves careful consideration of the desired dimensions, maintaining the aspect ratio, and utilizing appropriate resizing techniques. This ensures that the resized image retains its quality, clarity, and overall visual appeal.
Benefits of Image Resizing
Image resizing is a valuable process that offers numerous benefits in different contexts. Whether optimizing images for web usage, adapting them for responsive design, or enhancing print quality, resizing images can greatly improve their visual impact and efficiency.
By adjusting the dimensions or scale of an image, it becomes possible to achieve optimal display, faster loading times, storage optimization, and better compatibility across devices and platforms. Let's explore five key advantages of image resizing:
1. Improved Web Performance: Resizing images reduces their file size, enabling faster website loading times and enhancing user experience. It also helps in reducing bandwidth usage and optimizing storage space.
2. Responsive Design: Resizing images is crucial for responsive web design, allowing them to adapt and scale smoothly across various screen sizes and devices. This ensures a consistent and visually pleasing experience for users.
3. Print Optimization: By resizing images to the desired print dimensions, you can maintain their quality and ensure high-resolution output without pixelation or loss of detail. This is especially important for professional printing purposes.
4. Efficient Content Sharing: Resized images facilitate faster uploading and downloading, making it easier to share them via email, messaging apps, or social media platforms. Smaller file sizes result in quicker transfers and improved bandwidth utilization.
5. Versatile Compatibility: Resized images are compatible with various devices, screens, and operating systems, allowing seamless viewing and accessibility. This ensures that your images look their best regardless of the platform or device used.
In summary, image resizing is vital in optimizing visual content for digital and print media. It enhances performance, responsiveness, and compatibility while maintaining the integrity and quality of the images.
Why Is Resizing Important?
Resizing images holds significant importance in various aspects of digital media and print. It involves adjusting the dimensions or scale of an image to achieve desired display and file size optimization. Let's explore some key reasons why resizing is important:
1. Optimal Presentation: Resizing ensures images fit properly within designated spaces, preventing distortion and maintaining visual appeal.
2. Efficient File Size: Resized images have smaller file sizes, enabling faster loading times, reduced storage requirements, and improved website performance.
3. Bandwidth Conservation: Smaller image sizes due to resizing consume less bandwidth when uploading, sharing, or displaying images online, enhancing user experience and reducing data usage.
4. Print Quality Control: Resizing ensures images have the appropriate resolution and dimensions for printing, preserving sharpness and detail without compromising quality.
5. Cross-Device Compatibility: Resized images are compatible with various devices, screens, and platforms, ensuring consistent and optimal display regardless of the viewing device or operating system.
6. Faster Transfers: Smaller image sizes resulting from resizing lead to faster uploading, downloading, and sharing times, streamlining workflows and enhancing efficiency.
7. Storage Optimization: Resized images occupy less storage space, allowing for better organization, improved file management, and efficient use of storage resources.
By recognizing the importance of image resizing, individuals and businesses can enhance visual presentation, improve performance, conserve resources, and deliver a seamless user experience across different mediums and platforms.
How Do I Resize it?
Resizing an image involves adjusting its dimensions to fit specific requirements. Understanding the process is essential for achieving the desired image size. When an image is resized, its pixel information is modified. If the image is reduced in size, unnecessary pixels are removed, while enlarging an image requires the addition of new pixels, often resulting in a pixelated or blurry appearance.
It's important to note that reducing image size is generally easier and produces better results than enlarging it. For high-quality prints or large-format posters, capturing the image with high resolution and quality from the beginning is crucial since enlarging can be challenging.
In simpler terms, resizing an image means changing its size to fit specific needs. When making an image smaller, some details are removed, while making it larger involves creating new details that may not be as clear. So, starting with a high-resolution image is best when you anticipate needing larger sizes or better-quality prints.
The Maths Behind Image Resizing: Understanding Quality and Aspect Ratio
The process of resizing images is deeply connected to mathematics and computer science. In digital form, an image is represented as a grid of pixels carrying specific color information. When we resize an image, the software recalculates this grid by either increasing the number of pixels (upsampling) or decreasing them (downsampling).
This involves using complex mathematical algorithms to fill in or remove pixel information. The quality of a resized image depends on the algorithms employed during this process. Common methods include a nearest neighbour, bilinear, and bicubic interpolation. Each method has its strengths and weaknesses.
For example, the nearest neighbour algorithm is fast but tends to produce lower-quality results. On the other hand, bilinear and bicubic interpolation offer better quality but are slower and require more computational resources. Understanding the mathematics behind image resizing also helps us grasp the concept of aspect ratio.
Maintaining the aspect ratio is vital to prevent image distortion during resizing. It ensures that the width and height of the image are changed proportionally, preserving the original shape and avoiding any unnatural stretching or squashing.
By delving into the mathematical aspects of image resizing, we can appreciate the intricacies of maintaining image quality and aspect ratio. This knowledge guides the selection of appropriate algorithms and techniques to achieve optimal results when resizing images.
The Upscaling Myth: Debunking the Notion of Bigger Always Being Better

There is a common misconception that increasing the resolution of an image, also known as upscaling, will automatically result in a higher-quality picture. However, this belief is not entirely accurate. Upscaling an image may make it larger, but it does not magically add new details not present in the original image.
Instead, the software relies on interpolation algorithms to estimate and fill in the missing information, often leading to a blurry or pixelated appearance. Upscaling is based on complex algorithms that analyze existing pixels to determine the colors of the new pixels. Unfortunately, these algorithms cannot create new details not captured in the original image.
As a result, while the image may appear fine at a smaller scale, the lack of sharpness and detail becomes increasingly noticeable when magnified. It is crucial to consider the quality of the original image when contemplating upscaling. If the initial image has low quality, upscaling will only magnify the existing flaws, resulting in further degradation of image quality.
On the other hand, a high-quality image may fare slightly better during upscaling, but it will still experience some loss of quality. To achieve satisfactory upscaling results, it is advisable to utilize advanced tools like our free Image Upscaler, which employs artificial intelligence (AI) to enhance image resolution effectively.
Determining Enlargement Potential: Understanding Megapixels and Photo Enlargement
For photographers using digital cameras, how large they can blow up or enlarge their photographs is a common concern. The megapixel count of a camera plays a crucial role in determining the potential size of an enlargement. This article aims to provide insights into the enlargement capabilities based on different camera types and pixel settings.
We recommend enrolling in our online photography course if you desire a more in-depth understanding of photography. This comprehensive and interactive course offers comprehensive knowledge and practical guidance to enhance your photography skills.
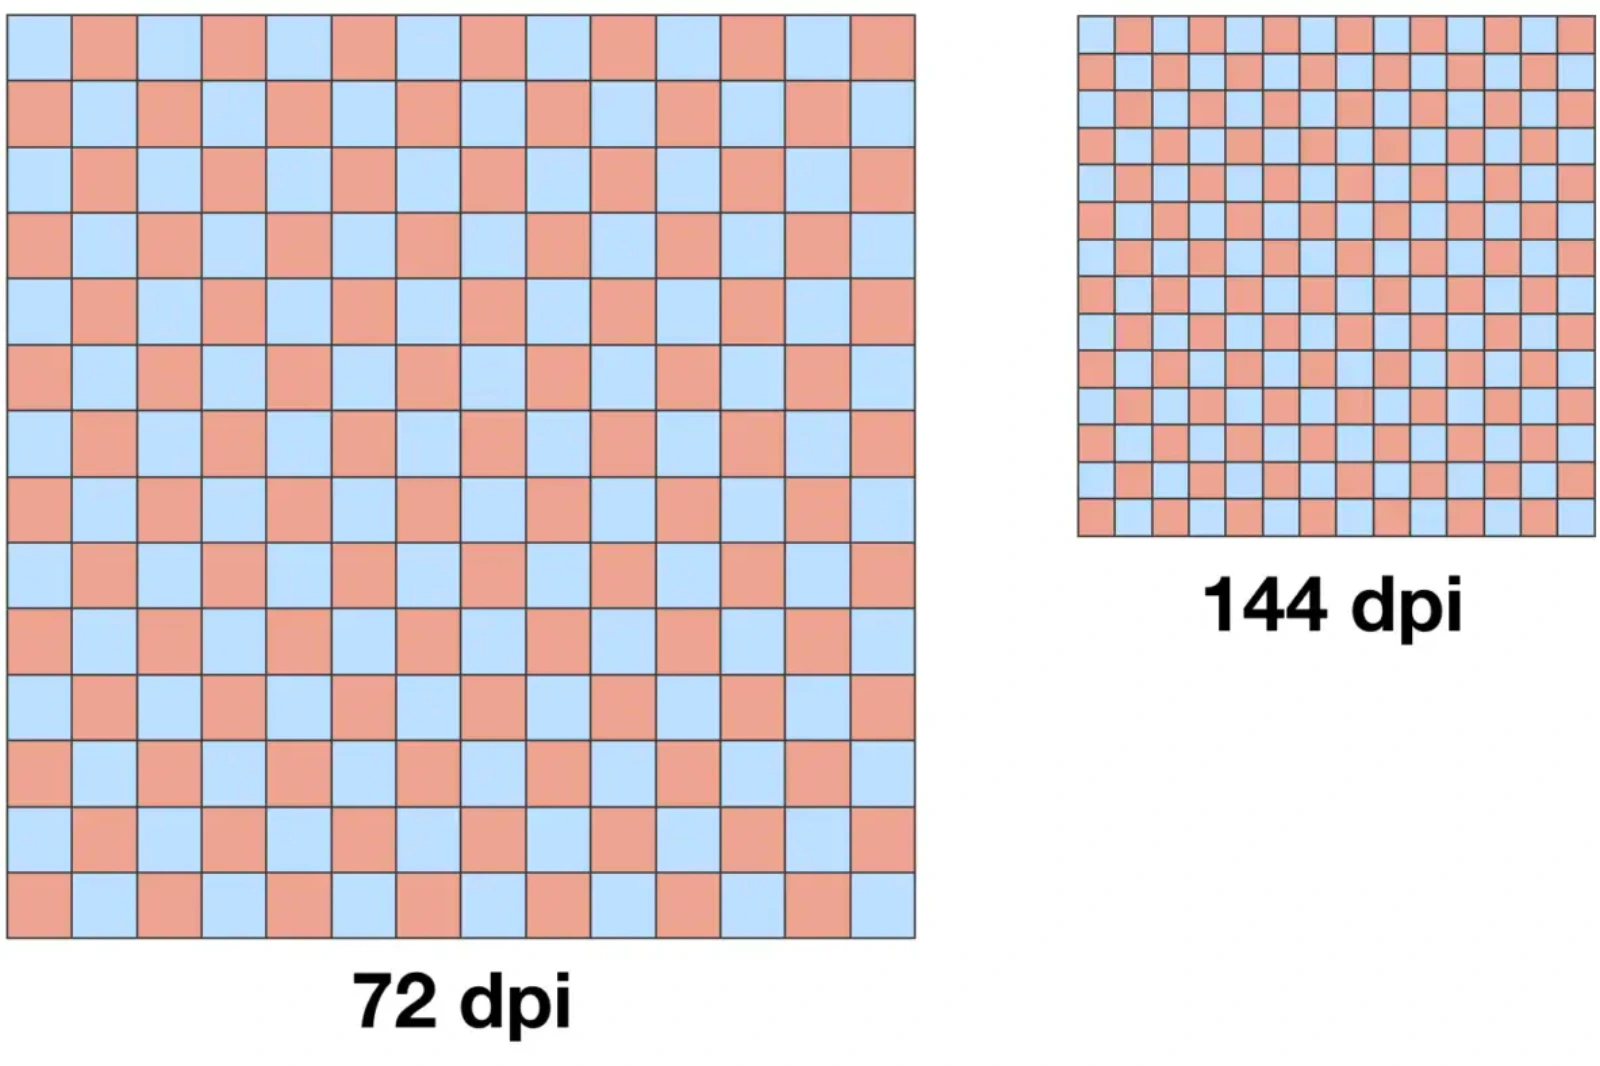
Printing and Scanning Resolution: A Guide to DPI Calculation

Understanding DPI (dots per inch) is crucial for printing and scanning images. The DPI calculator below helps determine the appropriate image size for desired print sizes or scanning resolutions. Whether printing at home or using a photo printing shop, knowing the right DPI value and providing sufficient pixels is essential for achieving high-quality prints.
Key Points to Consider:
1. Print Shop Printing: When ordering prints from a photo printing shop, the paper size will determine the print size. The shop will compute the necessary pixels per inch value to scale your image accordingly. Ensuring sufficient pixels and cropping the image to match the paper shape is vital for optimal results.
2. Home Printing: Home printers typically use the image file's DPI value to size the image on paper. The print menu in photo editing software allows adjusting the DPI and scaling to fit the paper size. However, image shape and paper shape may not always align, requiring cropping attention from the user.
3. Image Size and Shape: Images have both size and shape properties; matching the image shape with the selected paper shape is crucial. Cropping the image to the desired aspect ratio is essential before printing. Different paper sizes have different shapes, and providing the necessary pixels is equally important.
4. Scanning Resolution: When scanning at a specific resolution, the DPI calculator helps determine the output image size. Scanning a 10x8 inch area at 300 DPI will produce a 3000x2400 pixel image. Scanners usually display this information during the scanning process.
5. Printing Resolution: The calculator also assists in determining the required image size (in pixels) to achieve a desired print size at a specific DPI. For example, printing an 8x10 inch image at 300 DPI requires a resolution of 2400x3000 pixels. Aim for a pixel density of 240 to 300 pixels per inch for high-quality prints.
Remember, while the DPI number doesn't need to be exact, aiming for a pixel density within the ballpark of 240 to 300 pixels per inch ensures excellent print quality. Consider scaling and cropping images to match the desired print size and shape and provide sufficient pixels for optimal results. Please note that some terminology may refer to DPI as PPI (pixels per inch), signifying the same image resolution concept.
Understanding the Impact of DPI on Image Quality during Resizing
DPI, or dots per inch, plays a crucial role in determining the resolution of an image. When resizing images for print, a higher DPI generally leads to sharper and more detailed printouts. However, digitally increasing the DPI won't enhance the image's quality; it merely spreads the existing pixels over a larger area.
When resizing an image, it's essential to consider its DPI. Downsizing an image may not significantly affect on-screen quality, even if the DPI is reduced. However, when upscaling, maintaining a high DPI becomes crucial for preserving quality, especially for print purposes.
It's important to note that resizing an image doesn't introduce new detail. Therefore, starting with an original image with a high enough DPI to ensure quality is maintained at the larger size is vital when upscaling. By considering the DPI during resizing, you can optimise the image's quality for its intended use.
Understanding the Impact of File Formats on Image Resizing
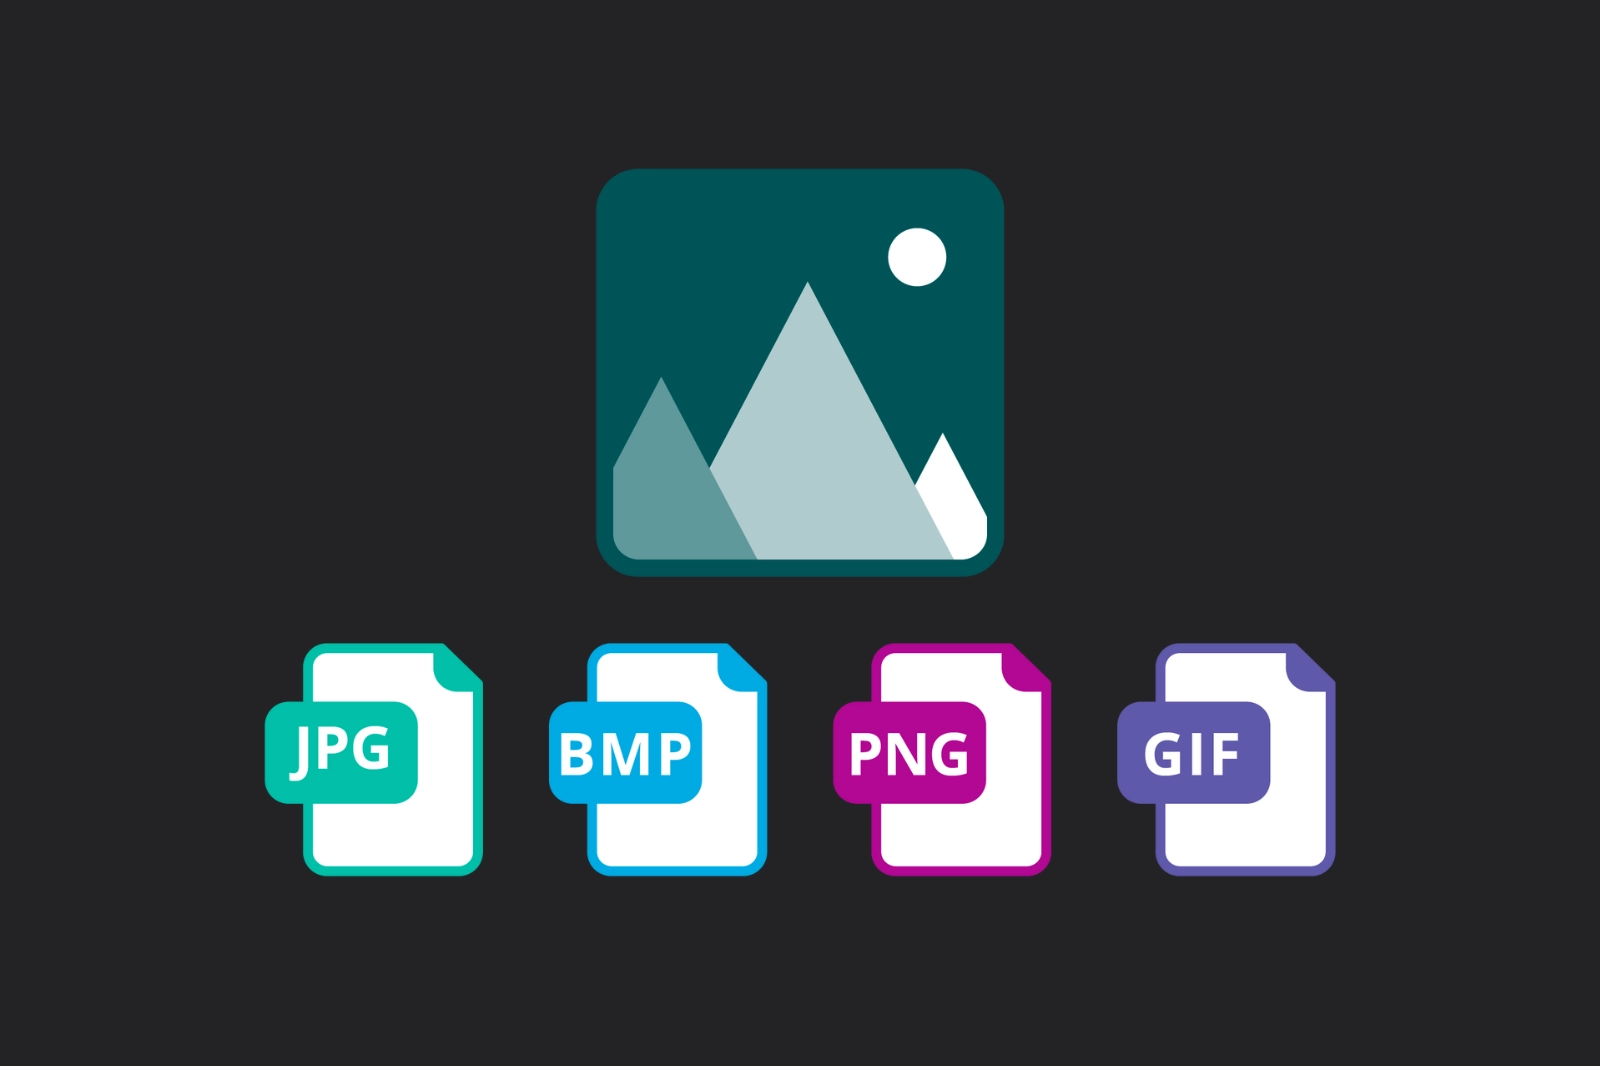
The choice of file format significantly affects how an image handles resizing. Raster formats, including JPEG, PNG, and GIF, have a fixed grid of pixels. When resizing a raster image, the software must add or remove pixels, which can result in a loss of quality. In contrast, vector formats like SVG are based on mathematical formulas instead of pixels.
This unique characteristic allows vector images to be resized without sacrificing quality, making them ideal for scalable designs like logos. However, vector formats may not be suitable for intricate, multi-coloured images such as photographs.
It is crucial to consider the purpose of the image and its complexity when selecting the appropriate file format for resizing. By understanding the strengths and limitations of different file formats, you can make informed decisions regarding resizing images while preserving their quality.
Understanding the Difference Between Scaling and Resizing Images
When working with raster images, it's important to distinguish between scaling and resizing. Scaling an image in programs like Word, Powerpoint, InDesign, or Dreamweaver doesn't resize the image but stretches it larger or scales it smaller. This stretching of pixels can result in a pixelated appearance without adjusting the resolution to match the new size.
Scaling an image larger than its original dimensions often produces a fuzzy or pixelated look. Scaling images smaller than the original dimensions has less impact on quality but can have other consequences. For instance, uploading a large image to a website and scaling it down requires the site to load the full-size version, potentially causing slower page loading.
There are exceptions to consider. When scaling down images, a small amount of scaling is generally acceptable. However, resizing images in dedicated photo editors like Photoshop or GIMP is strongly recommended for optimal photo quality. On the other hand, vector graphics, such as clipart and charts in Word or Powerpoint, are not made up of pixels.
Therefore, they can be stretched to any size without losing quality. By understanding the distinction between scaling and resizing, you can ensure the best results when working with raster images and maintain image quality across different sizes and platforms.
Factors Affecting Image Quality When Resizing
Several factors can influence the quality of a resized image. Here are the key factors to consider:
1. Original Image Quality: The quality of the original image plays a significant role in determining how well it will withstand resizing. High-quality images with a higher resolution tend to resize better without significantly losing quality.
2. Resizing Method: The method used to resize the image can impact the final quality. Different resizing algorithms produce varying results, such as nearest-neighbour, bilinear, or bicubic interpolation. Choosing the right method can help preserve the details and sharpness of the image.
3. Aspect Ratio: Maintaining the original image's aspect ratio is crucial to avoid distortion during resizing. Distorted aspect ratios can lead to stretched or squashed images that appear unnatural.
4. Intended Use: The purpose of the resized image also affects the acceptable level of quality loss. For web use, a slight compromise in quality may be acceptable to reduce file size for faster loading times. However, maintaining high-quality resolution becomes more important for print purposes to ensure sharpness and clarity in the final output.
By considering these factors and making informed decisions, you can optimise the quality of resized images for different applications.
The Importance of Original Image Quality in Resizing
The quality of the original image plays a crucial role in determining the outcome of the resized image. A high-quality original image with a higher resolution provides more pixel data for resizing. This abundance of pixel data allows for better results during resizing, resulting in a higher-quality resized image. Conversely, limited pixel data is available if the original image is of low quality and has a low resolution.
When you upscale such an image, the software has to create additional pixel information, leading to pixelation and a loss of sharpness and detail in the resized image. It's important to note that resizing can't enhance the original image's quality beyond what is already present.
Factors like lighting, focus, and camera quality during image capture contribute to the original image's overall quality. Resizing can't improve these aspects and will maintain the quality limitations of the original image. Starting with a high-quality original image sets a solid foundation for better resizing results.
Preserving Image Quality: The Role of Resizing Software
Preserving image quality during resizing is a key consideration, and it heavily relies on the image-resizing software used. Various software options, such as Photoshop, GIMP, and online tools, provide different resizing algorithms that can significantly impact the final quality of the resized image.
Sophisticated software options offer advanced resizing algorithms like bilinear and bicubic interpolation, which produce better results than simpler methods like nearest neighbour. Some software even incorporates artificial intelligence (AI) algorithms to preserve the maximum possible quality when upscaling images.
However, it's important to note that while software and algorithms can contribute to maintaining quality, they can't create details that aren't present in the original image. Starting with a high-quality original image is crucial because the software can only work with the information available within the image.
By selecting the appropriate image resizing software and utilising advanced algorithms, users can enhance their chances of preserving image quality during resizing. However, it's important to remember that the quality of the original image remains the foundation for achieving optimal results.
Resizing and Adjusting Image Data
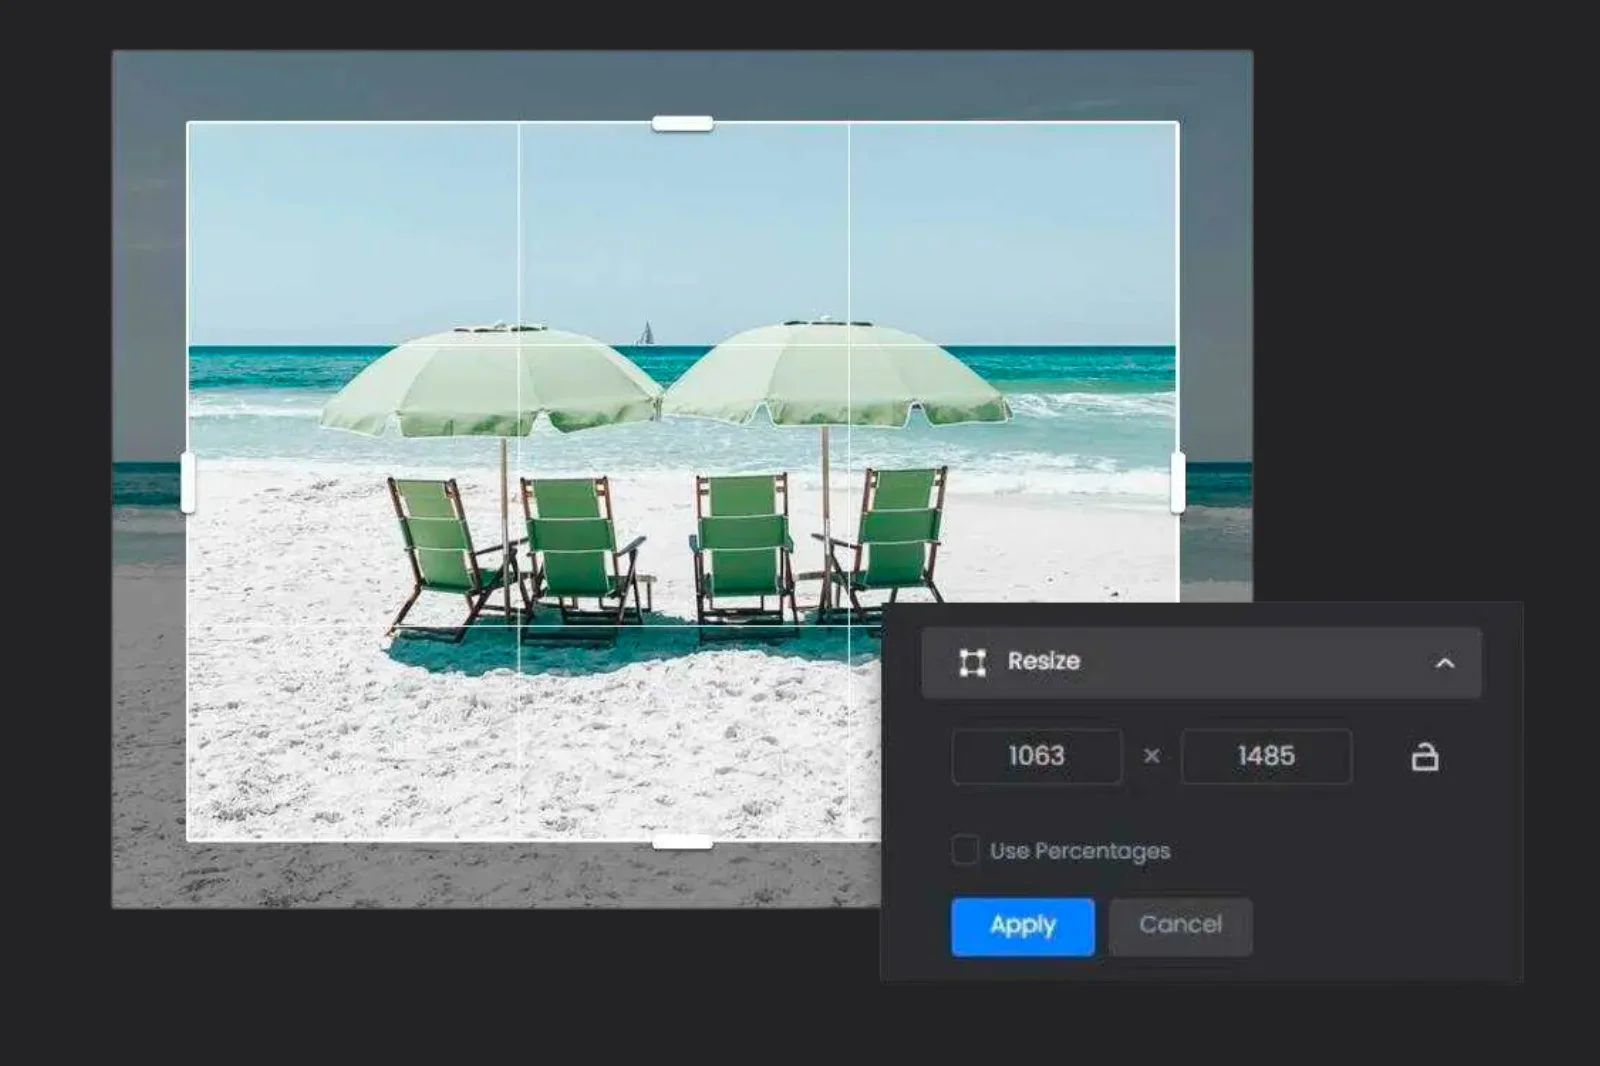
When you resize and adjust the data in an image, you modify the amount of information stored in the file. To adjust the image data, ensure that the "Resample" option is selected in the Image Size dialogue box. By default, Resample is enabled. Resampling alters the total number of pixels in the image, which is displayed as the Width and Height in pixels in the Image Size dialogue box.
When you increase the number of pixels (upsampling), the application adds data to the image. Conversely, when you decrease the number of pixels (downsampling), the application removes data. Whenever data is added or removed, it can impact the quality of the image to some degree.
Removing data is generally preferred, as upsampling requires the software to make educated guesses about the additional pixels. This process is more complex than downsampling, where the software determines which pixels to remove. Working with images with the appropriate resolution for the desired output is recommended for optimal results. Resampling should be performed only once if necessary.
Enabling the Resample option allows you to modify any values in the Image Size dialogue box, such as pixel dimensions, physical size, or resolution. Changing one value will affect the others, with the pixel dimensions always being affected.
1. Modifying the pixel dimensions affects the physical size but not the resolution.
2. Adjusting the resolution affects the pixel dimensions but not the physical size.
3. Changing the physical size affects the pixel dimensions but not the resolution.
It is important to note that the file size cannot be directly set; it changes when the total amount of data in the image (pixel dimensions) is altered. Before making changes, take note of the initial file size to understand the amount of data being added or removed during resampling.
For example, if the file size changes from 250 KB to 500 KB, it means that twice the amount of data is being added to the image, which can result in degradation. Degraded images may appear blurry, jagged, or blocky.
The Effect of Lossy and Lossless Resizing on Image Quality
When resizing an image, choosing between lossy and lossless methods can significantly impact the resulting image quality. Lossy resizing methods, such as JPEG compression, reduce the file size by discarding certain image data. This data loss can decrease image quality, particularly in sharpness, colour accuracy, and fine details. Lossy resizing is often used for web images or when file size is a priority, as it significantly reduces file size but costs some image quality.
On the other hand, lossless resizing methods, like PNG or TIFF formats, maintain all the original image data during resizing. This means the image quality remains intact, without any loss of detail or degradation. Lossless resizing is typically preferred when preserving image quality is crucial, such as in professional photography or graphic design.
It's important to note that lossy resizing can result in a more noticeable reduction in image quality with each subsequent resizing. Each compression introduces additional data loss, gradually degrading the image. Lossless resizing allows for multiple resizing operations without any cumulative loss of quality.
The choice between lossy and lossless resizing depends on the specific requirements of the image and its intended use. If file size is a priority and a slight loss of quality is acceptable, lossy resizing can be a suitable option. Conversely, if preserving image quality is paramount, opting for lossless resizing ensures that no image data is compromised.
Understanding the distinction between lossy and lossless resizing methods is essential for making informed decisions about image quality when resizing. Consider the trade-offs between file size reduction and image fidelity to determine the most appropriate resizing approach for your needs.
Strategies to Preserve Image Quality During Resizing
When resizing an image, there are several strategies you can employ to maintain its quality and ensure optimal results. Here are some key strategies to consider:
1. Start with a high-resolution image: Beginning with a high-resolution image provides more pixel data, giving you greater flexibility during resizing. This allows for better preservation of details and overall image quality.
2. Use lossless resizing methods: Opt for lossless resizing methods such as PNG or TIFF formats whenever possible. These formats retain all the original image data, preventing any loss of quality or degradation.
3. Choose the right resizing algorithm: Different resizing algorithms, such as bilinear or bicubic interpolation, can yield different results. Experiment with different algorithms and choose the one that produces the best balance between sharpness, smoothness, and preservation of details.
4. Maintain the aspect ratio: Resizing an image while maintaining its aspect ratio ensures that the proportions of the original image are preserved. This helps avoid distortion and maintains the visual integrity of the content.
5. Resize in small increments: If you need to resize an image significantly, it's generally better to do it in multiple small increments rather than in one large step. This gradual resizing approach allows for better control and minimizes the risk of noticeable quality loss.
6. Avoid excessive upsizing: Upsizing an image significantly beyond its original dimensions can result in pixelation and loss of sharpness. If possible, try to work with images with sufficient resolution for the desired output size to avoid excessive upsizing.
7. Preview and inspect the resized image: Before finalizing the resizing process, carefully examine the resized image at its intended size. Zoom in to check for any loss of details, artifacts, or blurriness. Make necessary adjustments or try alternative resizing settings if the quality is not satisfactory.
By implementing these strategies, you can maintain image quality while resizing and achieve the best possible results. Remember to strike a balance between resizing for specific requirements, such as file size or printing dimensions, while ensuring the integrity and clarity of the image are preserved.
Resizing Images without Resampling: Preserving Image Quality
When resizing images without resampling, the goal is to change the image's physical dimensions while keeping the original pixel data intact. This approach helps maintain image quality and prevents any loss of detail or introduction of artifacts. Here are the steps to resize an image without resampling:
Step 1 - Open the image in photo editing software, such as Photoshop or GIMP.
Step 2 - Go to the "Image" menu and select "Image Size" or a similar option.
Step 3 - Uncheck the "Resample" or "Constrain Proportions" box. This ensures that the pixel data remains unchanged during resizing.
Step 4 - Enter the desired dimensions for the width and height of the image. Make sure to specify the units of measurement (pixels, inches, centimeters) based on your preference.
Step 5 - The software will calculate and display the new physical size of the image while keeping the original pixel data intact.
Step 6 - Preview the resized image to ensure it meets your requirements. Zoom in to check for any loss of details or pixelation. Adjust the dimensions if necessary.
Step 7 - Save the resized image with a new file name to preserve the original image.
You avoid introducing interpolation or estimation of pixel data by resizing an image without resampling. This method is especially useful when you want to change the size of an image for specific purposes, such as fitting it into a layout or adjusting the dimensions for online display. It allows you to maintain the original image quality and prevent any unwanted changes or degradation.
Tips for Resizing Images:
1. Maintain aspect ratio: When resizing an image, maintain the aspect ratio to avoid distorting the image's proportions. Most image editing software provides an option to lock the aspect ratio while resizing.
2. Use high-quality originals: Start with high-resolution images whenever possible. Higher-resolution originals provide more pixel data, allowing for better quality when resizing.
3. Resize in stages: If you need to reduce the size of an image drastically, consider resizing it in stages rather than making a single large reduction. This can help minimize the loss of detail and prevent excessive pixelation.
4. Use appropriate resizing methods: Different resizing algorithms can yield different results. Experiment with various methods, such as bicubic or Lanczos interpolation, to determine which produces the best outcome for your image.
5. Preview before saving: Always preview the resized image before saving it. Zoom in and inspect the details to ensure the quality meets your expectations. Make adjustments if needed before finalizing the resizing process.
Resize Images Real Quick with Shrink.media
Shrink.media is a powerful online tool designed to simplify the process of resizing images. With Shrink.media, you can easily resize your images to specific dimensions while maintaining excellent image quality. This tool employs advanced resizing algorithms to ensure that your images are resized with precision and accuracy.
Shrink.media offers a user-friendly interface where you can upload your images and specify the desired dimensions. The tool performs the resizing process quickly and efficiently, delivering resized images that are optimized for various purposes, such as web publishing, social media, or printing.
Whether you need to resize a single image or batch resize multiple images, Shrink.media provides a convenient and reliable solution. By utilizing the capabilities of Shrink.media, you can effortlessly resize your images without compromising on quality, saving you time and effort in the image resizing process.
Conclusion
In conclusion, resizing images is a common task that requires careful consideration to maintain image quality. By following the tips mentioned above, such as maintaining the aspect ratio, using high-quality originals, resizing in stages, using appropriate resizing methods, and previewing the results, you can ensure that your resized images retain their visual integrity.
Furthermore, utilizing tools like Shrink.media can greatly simplify the resizing process and help you achieve optimal results. With its advanced resizing algorithms and user-friendly interface, Shrink.media provides a convenient solution for resizing images while preserving their quality.
Remember, resizing an image should be approached thoughtfully, balancing the need for specific dimensions or file sizes with the importance of maintaining image clarity and detail. You can resize images effectively without compromising their overall quality with the right techniques and tools.
FAQ's
The Importance of Resizing Images by Pixel and How to Do It
Resizing images by pixel refers to changing the dimensions of an image by adjusting the number of pixels it contains. This process can make the image smaller or larger without affecting its quality.
Why is it important to resize images by pixel?
Resizing images by pixel is important to optimize image size for various purposes, such as reducing loading times on websites, optimizing file size for sharing, and ensuring compatibility with different devices and platforms.
Is "Shrink.media" the best image shrink tool without losing image quality?
"Shrink.media" is known for its image compression capabilities, but the term "best" is subjective and may depend on individual needs. Other tools like TinyPNG, Kraken.io, or Compressor.io also offer effective image shrinking with minimal quality loss.
Does "Shrink.media" offer free image resizing options?
"Shrink.media" typically offers both free and paid plans. The free version may have limitations, such as image resolution or the number of image compressions allowed. Upgrading to a paid plan unlocks additional features and higher quality outputs.
How do I resize images by pixel using "Shrink.media" or other tools?
To resize images using "Shrink.media," you can upload your image, choose the desired compression level or pixel dimensions, and download the resized image. Other tools have similar straightforward processes for resizing images.
Can I bulk resize images by pixel with "Shrink.media" or other tools?
Some image shrink tools, including "Shrink.media," support bulk resizing, allowing you to resize multiple images at once to save time and effort.
The Importance of Resizing Images by Pixel and How to Do It
Resizing images by pixel refers to changing the dimensions of an image by adjusting the number of pixels it contains. This process can make the image smaller or larger without affecting its quality.


