
How To Optimize Images for Website to Make Speed Webpage


Optimizing images for the web is crucial for achieving fast loading times and enhancing user experience. With techniques like compression, resizing, and format selection, you can strike a balance between visual appeal and performance.
Photo optimization allows you to optimize image size and quality, reducing file size without compromising clarity. This improves website speed and responsiveness. Website image optimization takes it a step further by optimizing all website images collectively.
Techniques like lazy loading and responsive image delivery ensure efficient image delivery based on user devices and screen sizes. Compressing images specifically for websites significantly improves page load times, benefiting users with slower connections.
Using compression tools and plugins helps maintain image quality while achieving optimal file sizes. Choosing the right image format is also crucial. Formats like JPEG, PNG, and GIF offer unique advantages based on content and purpose.
In this blog post, we explore various image optimization techniques, best practices, and tools to empower you in optimizing your web images. Unlock the secrets to image optimization success and achieve outstanding web performance. Let's get started!
What is Image Optimization?
Image optimization is the process of reducing the file size of an image without compromising its quality. It involves various techniques such as compression, resizing, and format selection to improve web pages' performance and loading speed.
By optimizing images, you can enhance user experience, reduce bandwidth usage, and improve search engine rankings. Image optimization ensures that images are delivered most efficiently, balancing visual appeal and optimal file size. It is an essential practice for web developers and designers to create fast-loading websites and improve overall website performance.
Here are some Detail Points for Image Optimization
1. Image optimization reduces the file size of images, making them load faster on websites.
2. Optimized images improve user experience by reducing page load times, minimizing bounce rates, and increasing engagement.
3. By optimizing images, you can save bandwidth and reduce hosting costs.
4. Image optimization improves SEO by enhancing page load speed, which is a ranking factor for search engines.
5. Properly optimized images maintain their visual quality while minimizing file size.
6. Techniques such as compression, resizing, and format selection are used in image optimization.
7. Image optimization is crucial for mobile devices, where bandwidth and data usage are often limited.
8. It is important to balance image quality and file size to achieve the best optimization results.
9. Image optimization is an ongoing process, as new images are added or existing ones are updated on a website.
10. Various tools and plugins are available to automate the image optimization and streamline workflow.
Benefits of Image Optimization
Optimising images for the web and performance brings numerous benefits to your website. Reducing image file sizes and improving loading times can enhance user experience, boost search engine rankings, and increase overall site performance. Here are eight key benefits of optimizing images:
1. Faster page load times: Optimized images load quickly, reducing user waiting time.
2. Improved user experience: Fast-loading images provide a smooth and seamless browsing experience.
3. Increased website performance: Optimized images contribute to overall site speed and performance.
4. Better search engine rankings: Fast-loading websites are favoured by search engines, leading to improved visibility.
5. Reduced bounce rates: Users are more likely to stay on your site when it loads quickly, reducing bounce rates.
6. Enhanced mobile experience: Optimized images are crucial for mobile users with limited bandwidth.
7. Cost savings: Optimized images reduce bandwidth usage and hosting costs.
8. Higher conversion rates: A fast and user-friendly website can increase conversions and sales.
By optimizing your images, you can create a more efficient and enjoyable user experience, improve search engine visibility, and ultimately achieve your website's goals more effectively.
Reason and Data for Image Optimization
Why is it important to format your images? What advantages does it offer? Optimizing your images for performance brings numerous benefits. According to HTTP Archive, as of November 2018, images typically account for about 21% of a webpage's total weight. This means that images should be your top priority after video content when optimising your website.
Interestingly, image optimization is even more crucial than handling scripts and fonts. Surprisingly, implementing a solid image optimization workflow is relatively simple, yet many website owners neglect this aspect.
How to Optimize Images for Web and Performance?
Optimizing images for web and performance is crucial for ensuring fast-loading websites and providing a seamless user experience. Reducing file sizes and maintaining acceptable image quality can significantly improve page load times and enhance your website's overall performance.
There are various methods and techniques available to achieve image optimization, and in this section, we will explore seven key topics to help you optimize your images effectively.
- Choosing the right file format: Selecting the appropriate file format for your images can significantly impact their size and quality. Understanding the differences between JPEG, PNG, and GIF formats will help you make informed decisions.
- Compressing images: Compression is vital in reducing file sizes without sacrificing image quality. Various compression techniques and tools are available to optimize your images efficiently.
- Resizing and scaling images: Properly resizing and scaling images to fit the dimensions of your website can further reduce their file size and enhance loading times.
- Optimizing image alt attributes: Adding descriptive and keyword-rich alt attributes to your images not only improves accessibility but also contributes to better search engine optimization (SEO).
- Leveraging lazy loading: Implementing lazy loading techniques allows images to load only when they are in the user's viewport, minimizing the initial page load time.
- Implementing responsive images: By using responsive design techniques, you can deliver appropriately sized images based on the user's device and screen resolution.
- Caching and content delivery networks (CDNs): Utilizing caching mechanisms and CDNs can help improve image loading speed by storing images closer to the user and reducing server requests.
By following these optimization strategies, you can enhance your website's performance, reduce page load times, and deliver a better user experience.
1. Choose the Right File Formate
Before you begin optimizing your images, it's crucial to select the most suitable file format. There are various file types available, each with its own characteristics and considerations. Understanding the differences between them will help you make informed decisions for your image optimization needs.
Among the commonly used file formats are PNG, JPEG, and GIF. PNG offers higher image quality but comes with a larger file size. It was designed as a lossless format, although it can also support lossy compression.
JPEG, on the other hand, uses a combination of lossy and lossless optimization, allowing you to adjust the quality level to find a balance between image quality and file size. GIF, limited to 256 colors, is primarily used for animated images and employs lossless compression.
While there are other file formats available, such as JPEG XR and WebP, their support may vary across different browsers. For most website owners, JPEG, PNG, and GIF are the key formats to consider. JPEG is recommended for photos or images with vibrant colors, PNG for simple or transparent images, and GIF specifically for animated images.
By understanding the distinctions between these file formats, you can make informed decisions when optimizing your images to strike the right balance between image quality and file size, ensuring optimal performance for your website.
2. Image Compression Considerations:

When it comes to image optimization, compression plays a crucial role in finding the right balance between quality and file size. Understanding the impact of different compression levels is important to ensure optimal results for your images.
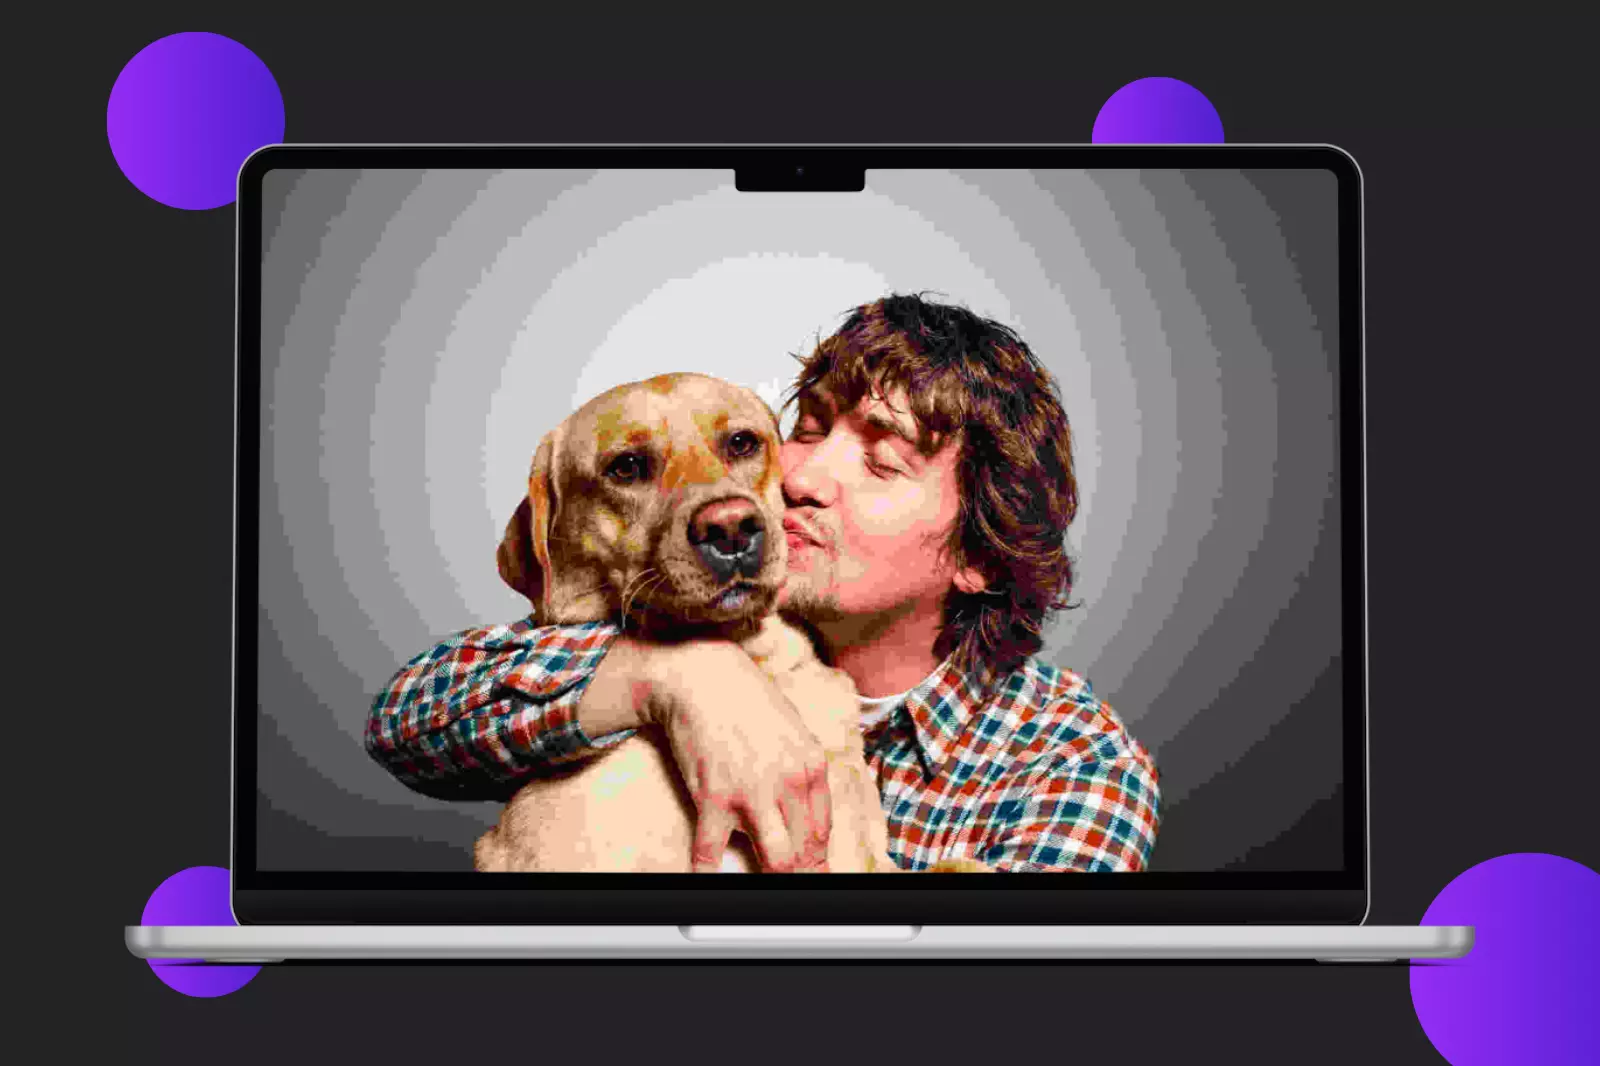
For instance, applying very low compression results in the highest quality but larger file sizes, as seen in the first example image. Conversely, high compression yields significantly smaller file sizes but compromises the image quality, as shown in the second example.
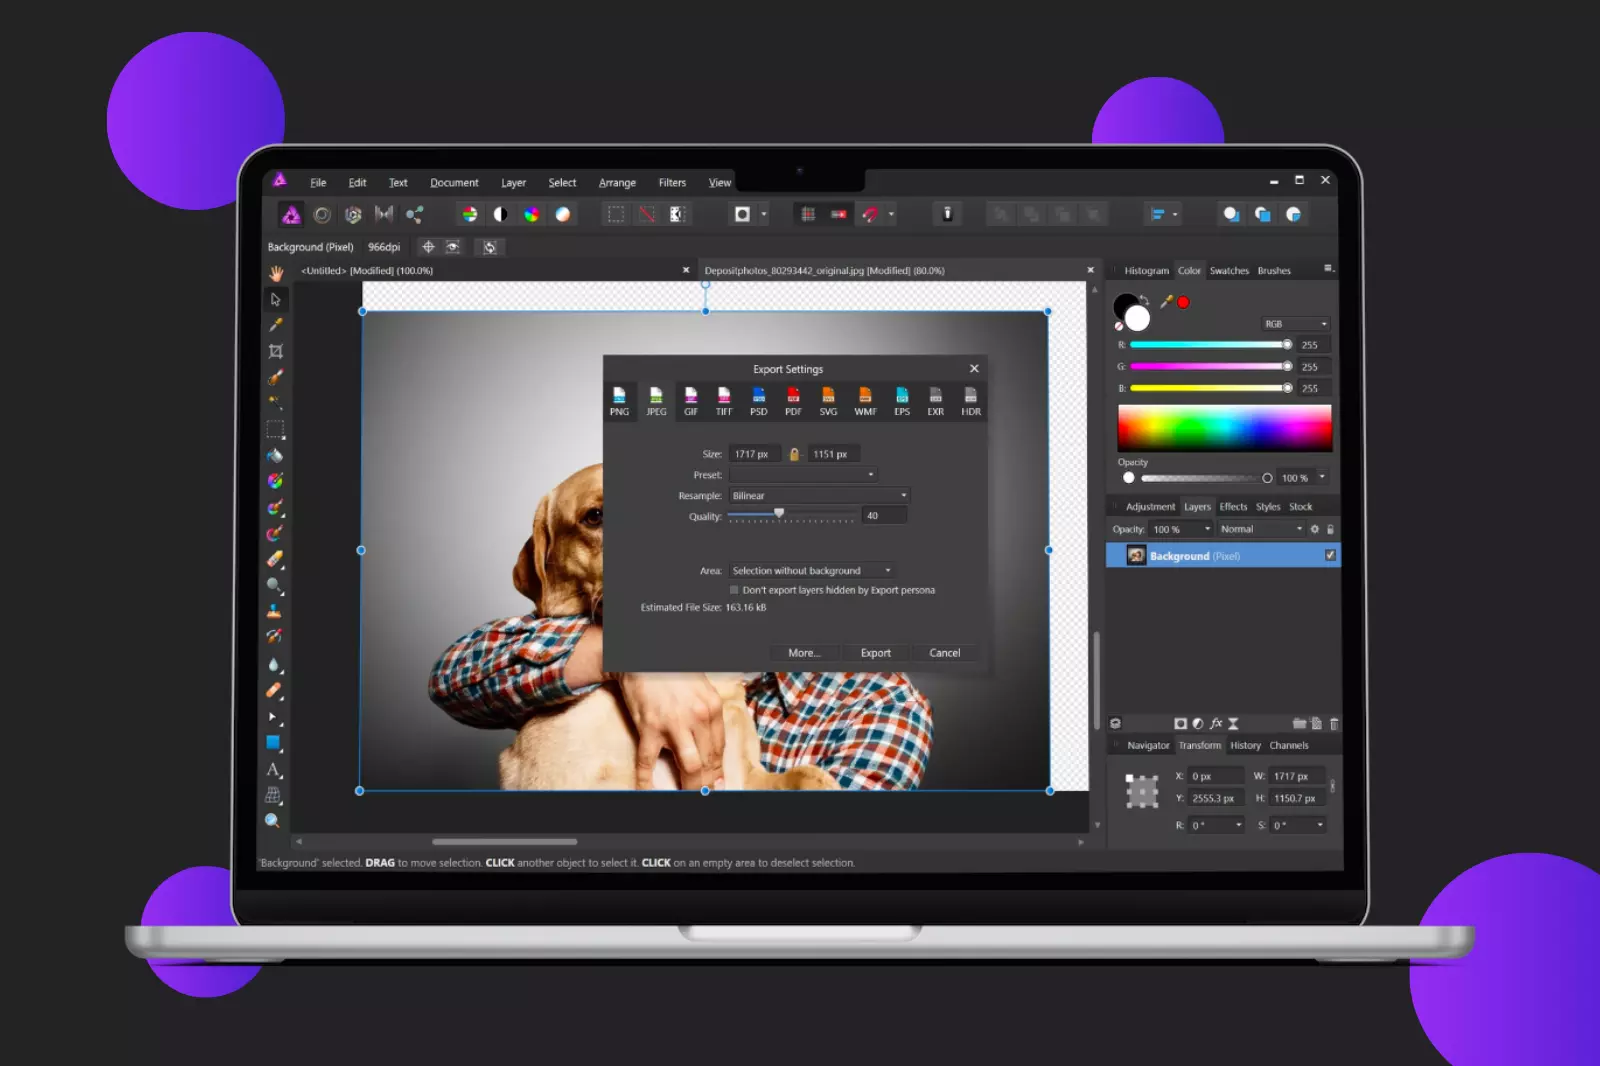
Various types and levels of image compression are available, and the settings may vary depending on the compression tool you use. Popular image editing software like Adobe Photoshop, ON1 Photo, GIMP, and Affinity Photo provides built-in compression features. Additionally, web-based tools like Shrink.Media and JPEGmini offer convenient options for image compression.
Finding a balance between compression rate (quality) and file size is important. This ensures that your images maintain acceptable quality while keeping file sizes optimized. For example, the third image in our example strikes a medium compression rate, resulting in good quality with a file size of 151 KB, which is acceptable for a high-resolution photo.
You can utilize WordPress plugins such as Optimole and EWWW Image Optimizer to streamline the compression process. These plugins automatically compress images upon upload, making them convenient for beginners and larger organisations.
By understanding and implementing appropriate compression techniques, you can effectively reduce the file sizes of your images while maintaining satisfactory visual quality, enhancing your website's performance.
3. Lossy vs. Lossless Compression:
When optimizing your images, it's essential to understand the difference between two compression techniques: lossy and lossless. Each method offers distinct advantages and considerations.
Lossy compression involves selectively discarding some data from the image, resulting in a reduction in file size. However, this process also leads to a degradation in image quality. Tools like Adobe Photoshop and Affinity Photo allow you to adjust the quality settings for lossy compression. It's important to balance file size reduction and maintaining an acceptable level of image quality.
On the other hand, lossless compression compresses the image data without compromising quality. The compressed image needs to be uncompressed before rendering. Desktop tools like Photoshop, FileOptimizer, and ImageOptim offer lossless compression options.
To determine the optimal compression technique, it's recommended to experiment with different settings for each image or format. Many image editors provide the option to save images for the web, allowing you to make quality adjustments for optimal compression. It's important to find the right balance that reduces file size while preserving image quality to avoid compromising the visual appeal of the images.
By understanding the distinctions between lossy and lossless compression and utilizing appropriate compression techniques, you can effectively optimize your images for web and performance, enhancing both site speed and user experience.
4. Using Image Optimization Tools and Software:
To streamline the image optimization process, there are numerous tools and software available, both free and premium. These tools offer various features to help you optimize your images effectively. While Affinity Photo is a recommended option due to its affordability and comprehensive features, there are other notable tools worth exploring:
- Adobe Photoshop: A widely popular and feature-rich image editing software.
- GIMP: An open-source image editor offering a range of editing capabilities.
- Paint.NET: A user-friendly image editing software for Windows.
- GIFsicle: A command-line tool for optimizing GIF images.
- Shrink.Media: An online tool for compressing and resizing images.
- OptiPNG: A command-line tool for optimizing PNG images.
- pngquant: A tool for lossy compression of PNG images.
- FileOptimizer: A program that reduces file sizes of various image formats.
- ImageOptim: A Mac application for optimizing images.
- Trimage: A cross-platform tool for optimizing PNG and JPEG images.
- ImageResize.org: An online image resizing and optimization tool.
Remember, it's not just about reducing file size but also considering the method of serving images. Combining image optimization tools and efficient image-serving methods can greatly improve your website's performance.
5. Resizing Images to Scale:
When optimizing images for web and performance, resizing them appropriately is important. With the introduction of responsive images in WordPress 4.4, uploading images at an exact scale has become less crucial, as WordPress now generates multiple sizes of each uploaded image.
By utilizing the srcset attribute and including the available sizes, browsers can choose the most suitable version to download based on the device's resolution. This is particularly beneficial for HiDPI displays.
While the WordPress media library creates thumbnails based on your settings, the original image remains untouched. If you want to resize images and save disk space by not keeping the original file, you can use a free plugin like Imsanity.
Imsanity allows you to set a limit for image dimensions, ensuring that all uploaded images are constrained to a reasonable size that still meets the requirements of a typical website. This plugin integrates seamlessly with WordPress, functioning as if the contributor had already scaled the image to an appropriate size before uploading it.
By resizing images to scale and leveraging responsive design capabilities, you can optimize your website's performance and ensure images are displayed correctly across different devices and resolutions.
6. Automate Image Optimization with a WordPress Plugin:
Streamlining the image optimization process on your WordPress site can be easily achieved using an image optimization plugin. These plugins compress and resize your images automatically during the upload process, saving you time and effort.
Here are some recommended plugins for optimizing images on your WordPress site:
1. EWWW Image Optimizer Cloud: This plugin offers powerful image optimization features, including lossless and lossy compression options. It also provides a cloud-based service for faster optimization.
2. TinyPNG: TinyPNG is a popular plugin that uses advanced algorithms to compress PNG and JPEG images without compromising their quality. It automatically optimizes images upon upload, ensuring faster page load times.
3. Kracken.io: Kracken.io is a robust image optimization plugin that utilizes intelligent compression techniques to reduce file sizes while maintaining image quality. It offers various optimization modes and integrates seamlessly with WordPress.
4. Imagify: Imagify is a user-friendly plugin that optimizes images with just a few clicks. It offers three compression levels, allowing you to balance file size reduction and image quality.
By installing these image optimization plugins, you can automate the process of optimizing your images, resulting in improved website performance, faster page load times, and a better user experience.
6. Use the "Blur Up" Technique to Load a Lower Quality Image First:
In some cases, even with image optimization, large file sizes or numerous images on a page can still slow down site speed. To improve the user experience, it can be beneficial to optimize the load experience by implementing techniques that give the illusion of faster-loading images.
One effective method is to load a Lower Quality Image (LQI) first, displaying a smaller version of the image while the full-size image loads. This provides users with a visual element to engage with while waiting for the complete image to load, creating the perception of a faster loading time.
The "blur up" technique is a popular approach to implement this effect. It involves displaying a blurred version of the image initially and progressively transitioning to the sharp, high-quality image. By following a tutorial like the one on CSS-Tricks, you can learn how to apply this technique and enhance the user's perception of faster image loading.
7. Lazy Load Your Site Images:
Another technique to enhance the perceived loading speed of your images is lazy loading. Unlike traditional loading methods, lazy loading focuses on loading only the images that are currently visible to the user, rather than loading all the images on the page at once.
By implementing lazy loading, the images within the user's viewport are prioritized and fully loaded, while the remaining images are loaded as placeholders until the user scrolls to them. This approach ensures that the user sees the content they care about first, creating the illusion of faster image loading.
Lazy loading is a powerful technique on its own, and when combined with other image optimization strategies, it can further boost site performance. With the Smush plugin available for WordPress sites, implementing lazy loading becomes even easier.
By following these step-by-step image optimization tips, you can significantly improve your site's performance and speed. Don't forget to run another speed test to measure the impact of these optimizations on your site's performance. With the right image optimization tools, you'll notice a positive difference in your site's speed and overall performance.
8. Clean your Media Library:
To free up space and declutter your media library, consider using a tool like Media Cleaner. This plugin scans your media files and identifies unused ones, allowing you to easily browse through and delete them.
With Media Cleaner, you can confidently remove unused media files using its smart trashing system. Instead of permanently deleting the files, they are moved to a trash directory, giving you the opportunity to test your website and ensure everything functions correctly.
If you happen to find a missing file or media entry, you can effortlessly restore it with a single click. Alternatively, if everything appears to be in order, you can empty the trash and permanently remove the unused files.
By cleaning your media library with Media Cleaner, you can optimize your site's storage space and improve its overall organization.
Image Optimization Plugins you Can Use
Fortunately, when using WordPress, you have the convenience of using plugins to automate the formatting and compression of your images, saving you time and effort. These plugins are designed to optimize your image files automatically upon upload, even for images you have already added to your website.
This is particularly beneficial if you have a website with a large number of images. Here are some of the top plugins available to help you format and optimize your images for improved performance.
However, it is important to note that solely relying on plugins is not enough. Uploading large 2 MB images to your WordPress media library can quickly consume your web host's disk space. To achieve optimal results, it is recommended to resize your images using a photo editing tool before uploading them, and then utilize one of these plugins to further reduce their size.
Before choosing a specific plugin, it is also worthwhile to check if your web host provides built-in tools for image optimization. For instance, Kinsta offers a free Image Optimization feature for its customers.
This feature automatically creates optimized copies of WordPress images, stored at no additional cost. Utilizing Kinsta's lightning-fast CDN, the smaller of the two image files is served, enhancing speed. Customers also have the option to choose between lossless and lossy compression, based on their specific requirements.
By optimizing your images for the web using these plugins, you can significantly improve your website's performance, reduce load times, and enhance the overall user experience. Take advantage of the available tools and techniques to compress and optimize your images while maximizing their quality.
1. Imagify Image Optimizer:

Imagify is a powerful image optimization plugin that can automatically optimize your images upon upload. It offers three levels of compression - normal, aggressive, and ultra - allowing you to find the right balance between image quality and file size. With its easy-to-use interface and bulk optimization feature, you can optimize both new and existing images with just a few clicks.
2. Optimole:
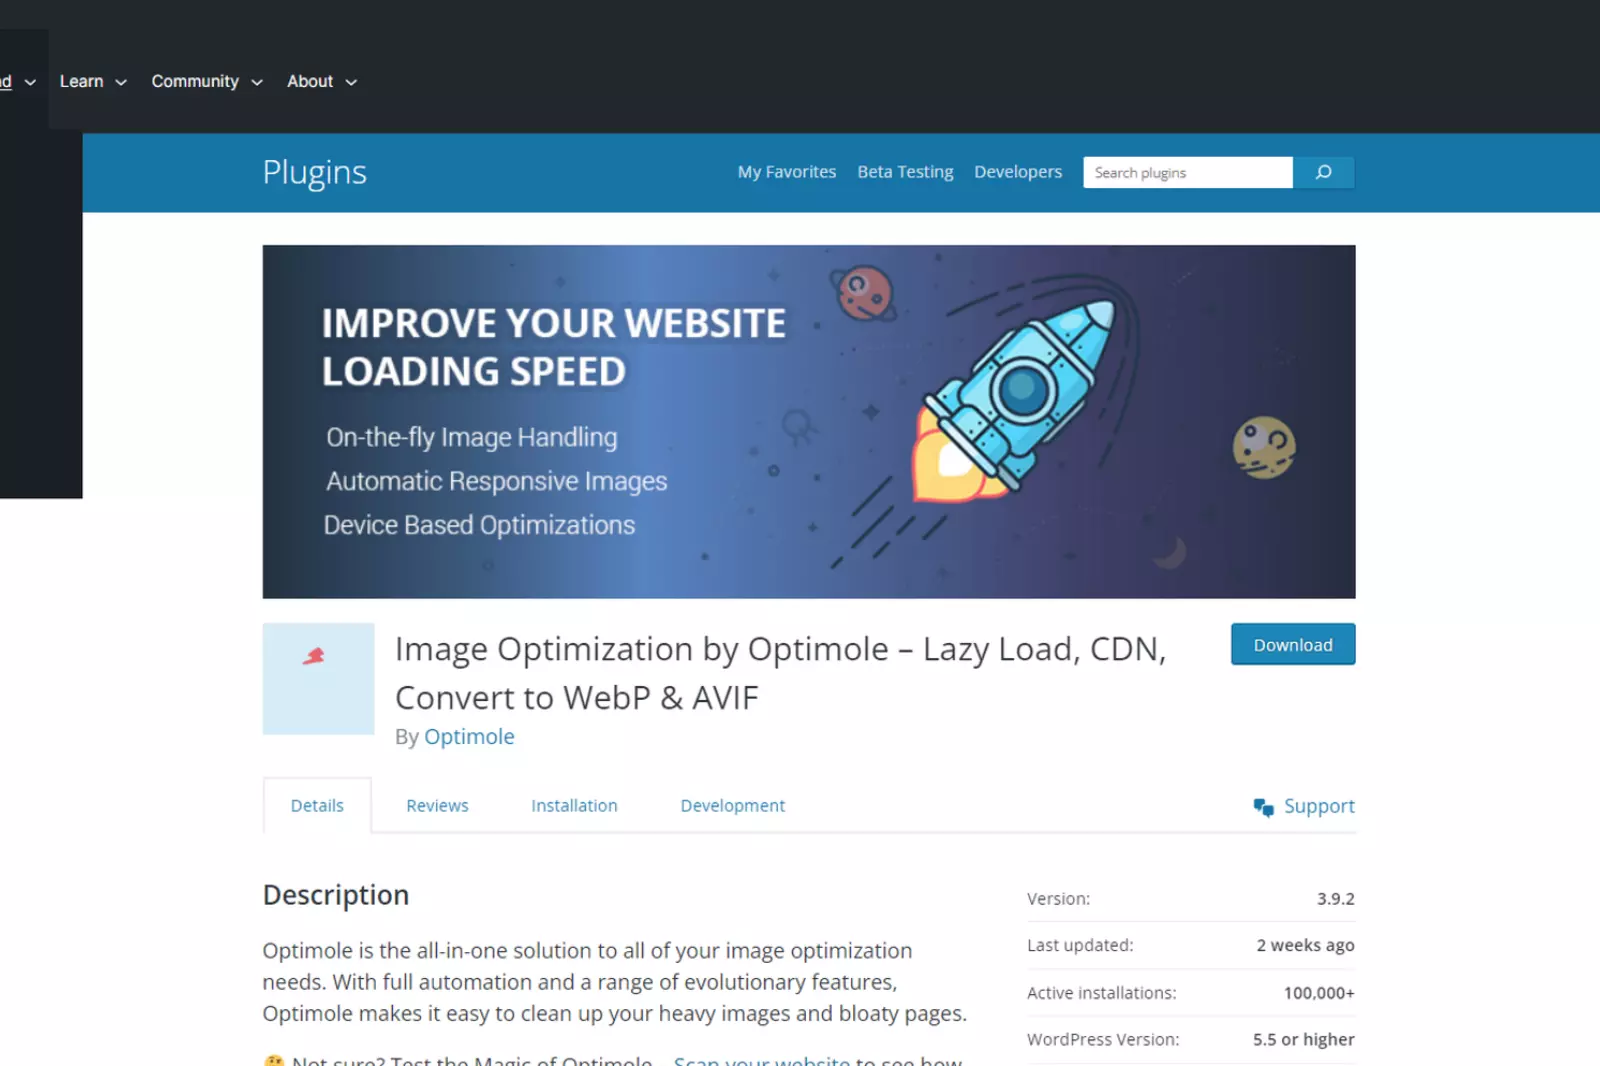
Optimole is a comprehensive image optimization plugin that offers advanced features such as lazy loading, dynamic resizing, and WebP support. It automatically optimizes and delivers the most suitable version of your images based on the user's device, ensuring optimal performance and faster loading times. With its intelligent caching system, Optimole minimizes server load and improves overall website speed.
3. Optimus Image Optimizer:

Optimus is a lightweight plugin that focuses on lossless image optimization. It removes unnecessary metadata from your images, reducing their file size without compromising quality.
Optimus also supports conversion to the WebP format, which offers superior compression and faster loading times. It seamlessly integrates with popular media libraries and allows for bulk optimization to save time and effort.
4. WP Smush:
WP Smush is a popular image optimization plugin that automatically compresses and resizes your images. It uses advanced compression techniques to reduce file sizes without sacrificing image quality.
WP Smush also offers a bulk optimization feature, allowing you to optimize all your existing images in one go. Additionally, it has lazy loading capabilities and can optimize images from other plugins and themes.
5. TinyPNG:
TinyPNG is a widely used image optimization plugin that specializes in compressing PNG and JPEG images. It automatically optimizes your images upon upload and can significantly reduce file sizes while maintaining visual quality.
TinyPNG also supports bulk optimization and provides a detailed report of the compression results. With its straightforward interface and reliable optimization algorithms, TinyPNG is a go-to choice for many website owners.
6. ImageRecycle:
ImageRecycle offers both image and PDF optimization capabilities. It optimizes images by removing unnecessary data while preserving image quality. The plugin also provides an option to convert images to the WebP format for further file size reduction. With its batch optimization feature and integration with popular media libraries, ImageRecycle simplifies the process of optimizing large image collections.
7. EWWW Image Optimizer:
EWWW Image Optimizer is a comprehensive image optimization plugin that automatically optimizes images upon upload. It offers both lossless and lossy compression options, allowing you to choose the level of optimization that suits your needs.
The plugin also supports WebP conversion, lazy loading, and integration with popular page builders. With its efficient optimization algorithms, EWWW Image Optimizer helps enhance website performance and improve user experience.
These plugins provide valuable tools and features to optimize your images, helping to improve website performance, reduce load times, and enhance overall user experience.
How to Optimize Image Online?
Shrink.media is an online image optimization tool that can help you reduce the size of your images without compromising their quality. With Shrink.media, you can easily optimize your images for web use, making them load faster and improving your website's performance.
Using Shrink.media is simple and convenient. You can upload your images directly on the website and choose the level of compression you desire. The tool utilizes advanced algorithms to reduce the file size of your images while preserving their visual integrity. You have control over the compression level, allowing you to strike the perfect balance between file size reduction and image quality.
By reducing the size of your images, Shrink.media helps optimize your website for faster loading times. This is crucial for providing a seamless user experience and improving your website's overall performance. Smaller image sizes also result in reduced bandwidth usage and lower hosting costs.
In addition to image compression, Shrink.media offers other useful features such as resizing, cropping, and converting images to different file formats. This versatility allows you to tailor your images to specific requirements, whether it's for web design, social media, or other digital platforms.
With Shrink.media, you can optimize your images online, saving time and effort in manual compression. Give your website a boost by reducing image sizes and ensuring fast loading times with the help of Shrink.media's efficient optimization tools.
Using SVG (Scalable Vector Graphics) Files in your Web Design has Several Benefits:
1. Scalability: SVGs are automatically scalable, which means they can be resized without losing quality. Whether you need to display an SVG image on a small mobile screen or a large desktop monitor, it will adapt and maintain its crispness. This scalability makes SVGs a dream for web and graphic designers, as they don't need to create multiple versions of an image for different screen sizes.
2. SEO-Friendly: Search engines like Google index SVGs just like they do with other image formats such as PNGs and JPGs. You don't have to worry about your SVGs being overlooked in search engine results. Including SVGs in your website can enhance your search engine optimization efforts and improve your visibility.
3. Smaller File Sizes: SVGs are generally smaller in file size compared to other image formats like PNG or JPG. This is because SVG files are based on vector graphics, which use mathematical equations to describe shapes, rather than storing individual pixels. The smaller file size of SVGs results in faster load times, contributing to a better user experience and improved website performance.
By utilizing SVG files, you can optimize your website's images for scalability, SEO, and faster load times. Whether it's for logos, icons, or simple graphics, SVGs offer flexibility, compatibility, and smaller file sizes, making them a valuable asset in web design.
Best Practices for Optimizing Images for the Web
When it comes to optimizing images for the web, following best practices can significantly improve your website's performance and user experience. Here are some key recommendations:
1. Use an External Image Optimization Service: Consider using a WordPress plugin or an external service like Shrink.media that compresses and optimizes images on their servers. This reduces the load on your website and ensures efficient image delivery.
2. Utilize Vector Images: Use vector images alongside PNGs and JPGs whenever possible. Vector images, like SVGs, are scalable and retain their quality regardless of the display size, offering flexibility and smaller file sizes.
3. Employ a Content Delivery Network (CDN): A CDN helps serve your images quickly to visitors worldwide. It's particularly beneficial when combined with code minification for CSS and JavaScript to enhance website performance.
4. Remove Unnecessary Image Data: Before uploading images, remove any unnecessary metadata or hidden layers to reduce file size.
5. Optimize Image Dimensions: Save images in their intended dimensions to avoid relying on CSS resizing. WordPress now supports responsive images, allowing automatic delivery of the appropriate size.
6. Use Web Fonts Instead of Image Text: Opt for web fonts over placing text within images. Web fonts are more scalable and occupy less space.
7. Choose the Right Image Format: Select the appropriate image format based on your needs. Use GIFs for animations, PNGs for great detail and resolutions, and JPGs for general photos and screenshots.
8. Compress Images with Lossy Compression: Apply lossy compression when suitable to achieve smaller file sizes without significantly losing quality.
9. Experiment with Compression Settings: Test different compression settings for each image format to find the optimal balance between file size and quality.
10. Remove Unneeded Image Metadata: Strip unnecessary metadata from images to reduce file size further.
11. Automate the Optimization Process: Leverage automation tools and plugins to streamline the image optimization workflow, making the process more efficient.
12. Consider Lazy Loading: Implement lazy loading techniques to prioritize loading images within the user's viewport, enhancing the initial page rendering speed.
13. Save Images Optimized for Web: Use tools like Photoshop to save images specifically optimized for web display.
14. Utilize WebP Format: Consider serving images in the WebP format, particularly for Chrome users, as it provides smaller file sizes without sacrificing quality.
By following these best practices, including using an image optimization service like Shrink.media, you can effectively optimize your images for the web, improve website performance, and enhance user satisfaction.
Conclusion and Final Thoughts on Best Practices for Image Optimization
In conclusion, image optimization is a crucial aspect of web development that should not be overlooked. Implementing the best practices mentioned in this guide can significantly improve your website's performance, enhance user experience, and boost search engine rankings.
Optimizing images involves various techniques such as choosing the right file format, reducing file size through compression, optimizing alt attributes and thumbnails, utilizing CDNs, and testing images for optimal results. Additionally, leveraging image optimization plugins and tools, like those mentioned earlier, can simplify the process and automate certain tasks.
Remember to balance image quality and file size, ensuring that your images are visually appealing while maintaining optimal loading times. Regularly test your website's performance using speed testing tools to monitor the impact of your optimization efforts.
By optimizing your images, you can achieve faster load times, improve website accessibility, enhance SEO, and provide an overall better user experience. So, take the time to optimize your images and enjoy the benefits of a faster, more efficient website.
FAQ's
Why is image optimization important for website speed?
Image optimization reduces the file size of images, allowing webpages to load faster and improving overall website performance.
How can Shrink.media help in optimizing images for my website?
Shrink.media offers powerful image compression capabilities, reducing the file size of images without compromising their quality, thereby enhancing webpage loading speed.
Does image optimization affect image quality?
With advanced compression algorithms, Shrink.media minimizes image file size while maintaining satisfactory image quality, ensuring a balance between optimization and visual appeal.
Are there any other benefits of using Shrink.media for image compression?
Yes, Shrink.media not only compresses images but also offers additional features like resizing, format conversion, and batch processing, making it a comprehensive solution for image optimization needs.
Will optimizing images affect their visual quality?
Shrink.media employs advanced compression techniques to minimize file sizes while preserving image quality. The tool ensures that optimized images retain their visual appeal.
What image file formats does Shrink.media support?
Shrink.media supports popular image file formats such as JPEG, PNG, and GIF, allowing you to optimize images in the most commonly used formats.
Why is image optimization important for website speed?
Image optimization reduces the file size of images, allowing webpages to load faster and improving overall website performance.


